Building a Bare-Metal Kubernetes Cluster on Raspberry Pis, Part 1
Why I’m doing this
I wanted to learn how a real bare-metal Kubernetes cluster is put together, not just how to use one. Cloud and managed Kubernetes hide the interesting parts: bootstrapping the control plane, certificates, etcd, load balancing with no cloud provider, and upgrades. So I’m building a small cluster at home from Raspberry Pi 5 boards, on a budget of roughly $600-700, and documenting what I learn along the way.
k3s or full Kubernetes?
My first instinct was k3s: it’s lightweight, installs in minutes, and is still conformant Kubernetes, so everything I’d run on it works the same. On 4GB boards it also leaves more memory for workloads.
But my goal was to learn the real setup, and k3s hides a lot of it by bundling the control plane into one binary and shipping its own defaults. So I’m going with kubeadm, the tool underneath much of the industry’s bare-metal tooling.
The tradeoff is memory. Upstream control plane components (API server, etcd, controller manager, scheduler) use noticeably more RAM than k3s’s single process. On 4GB nodes, that matters.
The plan
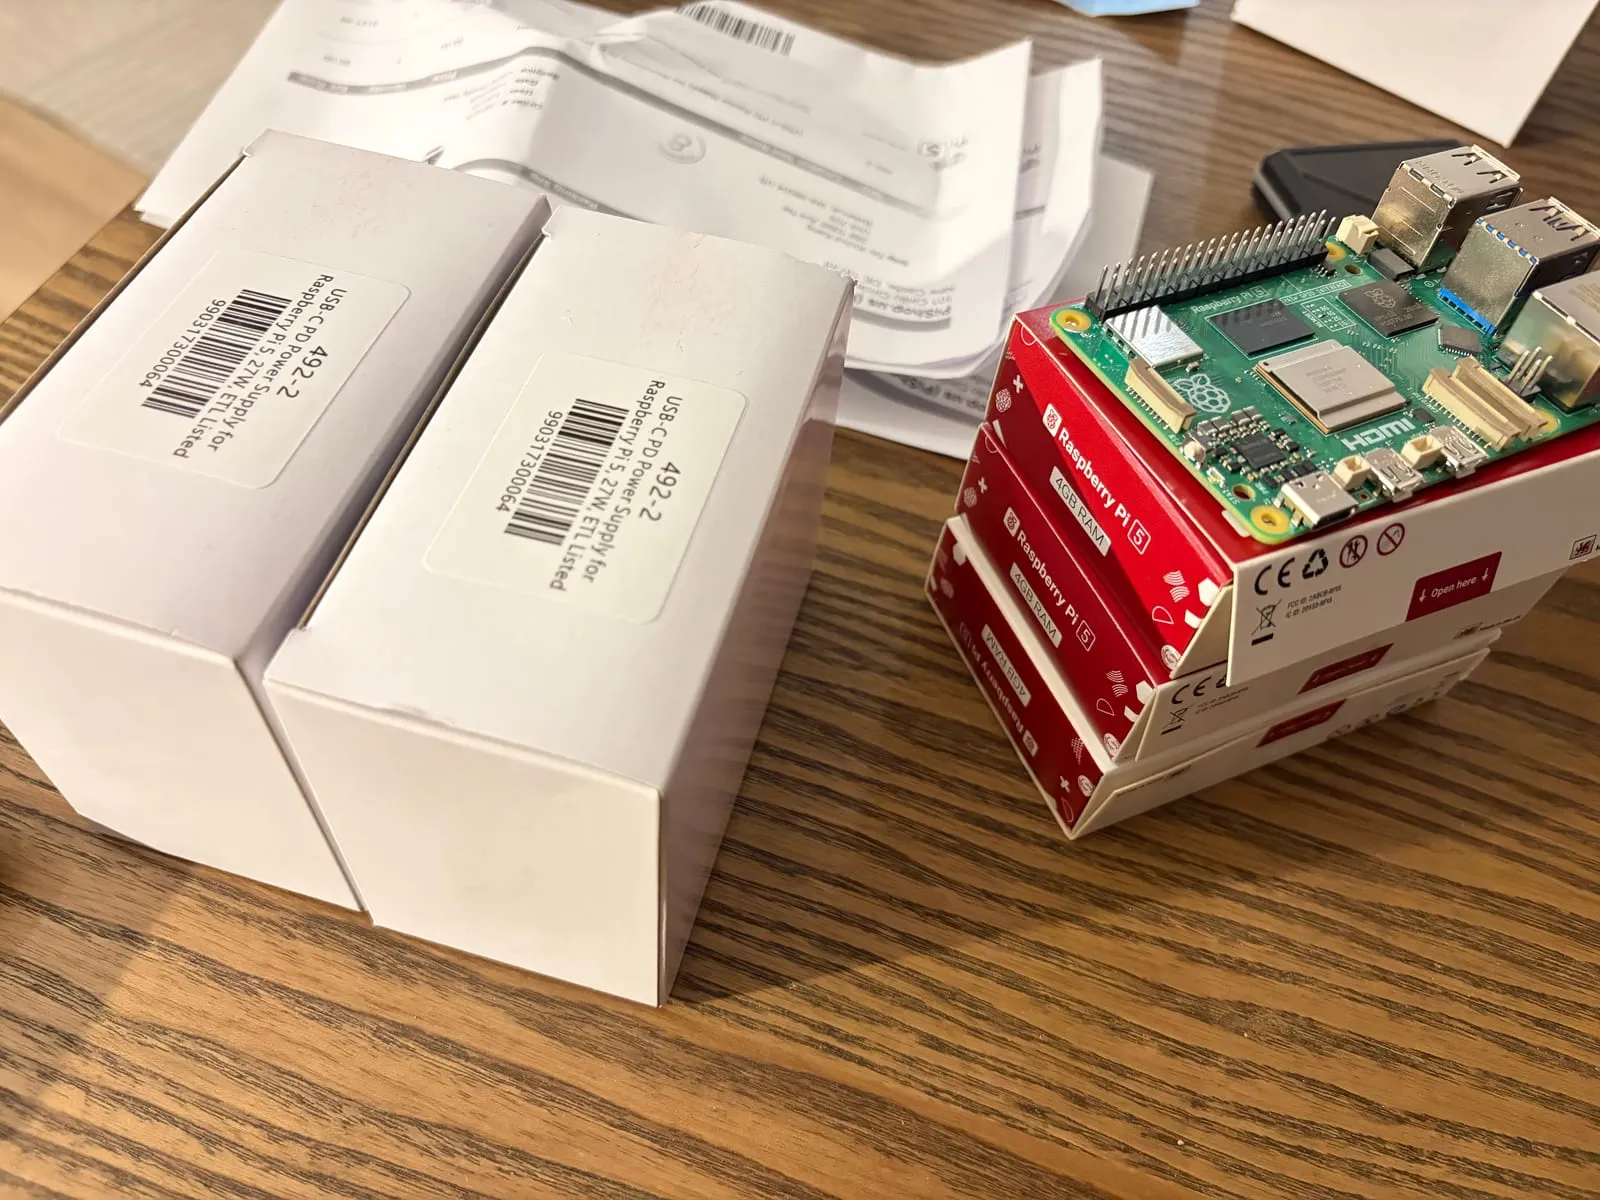
- Three Raspberry Pi 5 boards (4GB each). Larger models were expensive, and adding nodes later beats overbuying RAM.
- Three control plane nodes with stacked etcd, because production bare-metal clusters are almost always HA, and I want to practice quorum, failover and rolling upgrades. A virtual IP (kube-vip) sits in front of the API servers.
- SD cards first, SSDs later. I planned NVMe for etcd through the M.2 HAT+, but SSDs are expensive right now because of memory prices, and the official Raspberry Pi SSDs were out of stock where I looked. An SD card copes with an idle etcd, so I’m starting on SD cards I already had and will add SSDs later.
- GitOps with Argo CD managing everything on the cluster once it’s up.
I started with a single-node test on one Pi, then reset that node to become the first member of the HA cluster.
Hardware notes
A few things I learned while shopping:
- The 4GB Pi 5 was about $110 at one US reseller (limit one per order). Memory prices have pushed Raspberry Pi pricing up, and numbers varied a lot between sources.
- The standard M.2 HAT+ (not the Compact one) takes 2230 and 2242 NVMe drives. The drive must be M-key NVMe, since SATA M.2 drives won’t work.
- SSDs are expensive too, and the official Raspberry Pi SSDs were out of stock at the retailers I checked. Any M-key NVMe drive in 2230 or 2242 size works with the HAT+.
- The Pi 5 is picky about power, so use the official 27W supply.
Setting up the first node
I flashed Raspberry Pi OS (64-bit) to an SD card with Raspberry Pi Imager and configured everything before first boot, so the Pi comes up headless with no monitor or keyboard:
- Hostname:
node-1. - SSH with a public key.
- Wi-Fi for the test. Fine for one node, but the real cluster will be wired, because etcd is latency-sensitive and Wi-Fi jitter can cause missed heartbeats and leader elections.
- No Raspberry Pi Connect. SSH does the job.
Commands in the terminal blocks start with $, and the longer blocks have a comment above each step. ... marks output I trimmed for length.
Preparing the OS
Kubernetes depends on kernel features that a stock Pi doesn’t always enable.
The memory cgroup
Kubernetes enforces memory limits through Linux cgroups. The Pi’s firmware disables the memory controller by default (cgroup_disable=memory), so I appended cgroup_memory=1 cgroup_enable=memory to the single line in /boot/firmware/cmdline.txt and rebooted. Afterward, memory appeared in /sys/fs/cgroup/cgroup.controllers, and stat -fc %T /sys/fs/cgroup printed cgroup2fs, confirming cgroup v2.
# On node-1: append the cgroup flags to the kernel command line (it's a single line)
$ sudo nano /boot/firmware/cmdline.txt

# Confirm the flags are at the end of the line
$ cat /boot/firmware/cmdline.txt
console=serial0,115200 console=tty1 root=PARTUUID=... rootfstype=ext4 ... cgroup_memory=1 cgroup_enable=memory

# Reboot so the kernel picks them up
$ sudo reboot

# (reconnected over SSH after the reboot)

# The memory controller should now be listed
$ cat /sys/fs/cgroup/cgroup.controllers
cpuset cpu io memory pids

# Confirm the system uses cgroup v2
$ stat -fc %T /sys/fs/cgroup
cgroup2fs
Swap
kubelet won’t start with swap enabled by default. My Pi had zram swap on, and swapoff -a only lasts until the next boot, because the units that create it (rpi-swap and systemd-zram-generator, with the swap unit dev-zram0.swap) bring it back. Masking them in systemd keeps swap off.
# On node-1: zram swap is on
$ swapon --show
NAME       TYPE      SIZE USED PRIO
/dev/zram0 partition   2G   0B  100

# Turn it off now, and mask the units that would turn it back on at boot
$ sudo swapoff -a
$ sudo systemctl mask dev-zram0.swap systemd-zram-setup@zram0.service rpi-zram-writeback.timer
Created symlink '/etc/systemd/system/dev-zram0.swap' → '/dev/null'.
Created symlink '/etc/systemd/system/systemd-zram-setup@zram0.service' → '/dev/null'.
Created symlink '/etc/systemd/system/rpi-zram-writeback.timer' → '/dev/null'.
$ sudo reboot

# (reconnected over SSH after the reboot)

# Swap should stay off
$ swapon --show
Without the masking step, zram swap came back after my first reboot (/dev/zram0, 2G). After masking the units and rebooting again, swapon --show printed nothing, and systemctl list-units showed dev-zram0.swap and rpi-zram-writeback.timer as masked.
Kernel modules and sysctls
Kubernetes networking needs two kernel modules and three sysctl settings. overlay lets containerd build container filesystems from image layers. br_netfilter and the two bridge-nf-call settings make bridged traffic visible to iptables, which kube-proxy relies on for Services. ip_forward lets the node route packets between the pod network and the physical interface.
# On node-1: load the kernel modules now, and at every boot
$ cat <<EOF | sudo tee /etc/modules-load.d/k8s.conf
overlay
br_netfilter
EOF
overlay
br_netfilter
$ sudo modprobe overlay
$ sudo modprobe br_netfilter

# Set the networking sysctls
$ cat <<EOF | sudo tee /etc/sysctl.d/k8s.conf
net.bridge.bridge-nf-call-iptables  = 1
net.bridge.bridge-nf-call-ip6tables = 1
net.ipv4.ip_forward                 = 1
EOF
net.bridge.bridge-nf-call-iptables  = 1
net.bridge.bridge-nf-call-ip6tables = 1
net.ipv4.ip_forward                 = 1

# Apply them without rebooting
$ sudo sysctl --system
* Applying /etc/sysctl.d/k8s.conf ...
...
net.bridge.bridge-nf-call-iptables = 1
net.bridge.bridge-nf-call-ip6tables = 1
net.ipv4.ip_forward = 1
The files under /etc/modules-load.d/ and /etc/sysctl.d/ make the settings survive reboots, and modprobe and sysctl --system apply them right away. Checking the result:
# On node-1
$ lsmod | grep -E 'overlay|br_netfilter'
br_netfilter           65536  0
bridge                344064  1 br_netfilter
overlay               180224  0
ipv6                  622592  52 bridge,br_netfilter
$ sysctl net.bridge.bridge-nf-call-iptables net.ipv4.ip_forward
net.bridge.bridge-nf-call-iptables = 1
net.ipv4.ip_forward = 1
Installing containerd
kubelet doesn’t run containers itself. It asks a container runtime through the CRI interface, and containerd is the standard choice. I used Debian’s packaged version.
# On node-1: install containerd from Debian's repository
$ sudo apt-get update
Hit:1 http://deb.debian.org/debian trixie InRelease
...
$ sudo apt-get install -y containerd
...
Setting up containerd (1.7.24~ds1-6+deb13u1) ...
Created symlink '/etc/systemd/system/multi-user.target.wants/containerd.service' → '/usr/lib/systemd/system/containerd.service'.
...

# Write out the default config, then switch to the systemd cgroup driver
$ sudo mkdir -p /etc/containerd
$ containerd config default | sudo tee /etc/containerd/config.toml
...
$ sudo sed -i 's/SystemdCgroup = false/SystemdCgroup = true/' /etc/containerd/config.toml
$ grep SystemdCgroup /etc/containerd/config.toml
            SystemdCgroup = true

# Restart containerd to load the config, and start it at every boot
$ sudo systemctl restart containerd
$ sudo systemctl enable containerd

# It should be active
$ systemctl status containerd --no-pager
● containerd.service - containerd container runtime
     Loaded: loaded (/usr/lib/systemd/system/containerd.service; enabled; preset: enabled)
     Active: active (running) since Sun 2026-10-11 01:12:52 PDT; 7s ago
...
     Memory: 12.2M (peak: 14.2M)
...
The edit that matters is SystemdCgroup = true: kubelet and containerd must use the same cgroup driver, or pods become unstable. Debian’s package installed containerd 1.7.24, which matters later (see the warnings under kubeadm init).
Installing kubeadm, kubelet and kubectl
Debian’s repositories don’t carry current Kubernetes releases, so Kubernetes publishes its own apt repository at pkgs.k8s.io, with one repo per minor version. I used v1.36. apt-mark hold stops a routine apt upgrade from bumping the version, because cluster upgrades have ordering rules.
# On node-1: install what's needed to add an apt repository
$ sudo apt-get install -y apt-transport-https ca-certificates curl gpg
...
$ sudo mkdir -p -m 755 /etc/apt/keyrings

# Add Kubernetes' signing key and the v1.36 repository
$ curl -fsSL https://pkgs.k8s.io/core:/stable:/v1.36/deb/Release.key | sudo gpg --dearmor -o /etc/apt/keyrings/kubernetes-apt-keyring.gpg
$ echo 'deb [signed-by=/etc/apt/keyrings/kubernetes-apt-keyring.gpg] https://pkgs.k8s.io/core:/stable:/v1.36/deb/ /' | sudo tee /etc/apt/sources.list.d/kubernetes.list
deb [signed-by=/etc/apt/keyrings/kubernetes-apt-keyring.gpg] https://pkgs.k8s.io/core:/stable:/v1.36/deb/ /

# Install the three packages
$ sudo apt-get update
...
$ sudo apt-get install -y kubelet kubeadm kubectl
...

# Hold them so a routine upgrade can't bump the version
$ sudo apt-mark hold kubelet kubeadm kubectl
kubelet set on hold.
kubeadm set on hold.
kubectl set on hold.

# Start kubelet (it restarts in a loop until kubeadm gives it a config)
$ sudo systemctl enable --now kubelet
The install also pulled in kubernetes-cni and iptables. Checking the result (output trimmed):
# On node-1
$ kubeadm version
kubeadm version: &version.Info{Major:"1", Minor:"36", ... GitVersion:"v1.36.5", ... Platform:"linux/arm64"}
$ kubectl version --client
Client Version: v1.36.5
Kustomize Version: v5.8.1
During kubeadm init, kubeadm reported that the newest release is v1.37.1 and fell back to stable-1.36. I’m one minor version behind, which is supported, and it gives me a real upgrade to practice with kubeadm upgrade later.
Reserving the IP and running kubeadm init
kubeadm bakes the node’s IP into the API server certificate, so the address must not change. I reserved the Pi’s Wi-Fi address (10.0.0.150) in my router’s DHCP settings first, then pinned it on init:
# On node-1
$ sudo kubeadm init --pod-network-cidr=10.244.0.0/16 --apiserver-advertise-address=10.0.0.150
The --pod-network-cidr matches Flannel’s default range. The certificate line in the output shows the address baked in:
[certs] apiserver serving cert is signed for DNS names [kubernetes kubernetes.default kubernetes.default.svc kubernetes.default.svc.cluster.local node-1] and IPs [10.96.0.1 10.0.0.150]Init ran preflight checks, generated certificates and kubeconfig files, wrote static pod manifests for etcd and the control plane, configured bootstrap tokens, and applied the CoreDNS and kube-proxy addons. It ended with “Your Kubernetes control-plane has initialized successfully!” (I left out the join command at the end, since it contains a token.)
Three warnings appeared, and none of them stopped init:
- Container runtime version. Debian’s packaged containerd (1.7.24) doesn’t implement the CRI
RuntimeConfigmethod, so kubeadm fell back to reading the cgroup driver from kubelet’s config. kubeadm says that fallback is removed in 1.37, so for newer Kubernetes releases I’ll need containerd 2.x from upstream instead of Debian’s package. - Pause image. containerd’s default sandbox image is
registry.k8s.io/pause:3.8, while kubeadm recommendspause:3.10.2. This is harmless for now and can be aligned inconfig.toml. - Missing optional cgroup: hugetlb. Optional and harmless. containerd’s default config already tolerates a missing hugetlb controller.
Then I set up kubectl for my user:
# On node-1
$ mkdir -p $HOME/.kube
$ sudo cp /etc/kubernetes/admin.conf $HOME/.kube/config
$ sudo chown $(id -u):$(id -g) $HOME/.kube/config
admin.conf is the cluster-admin credential, which is why I copy it and take ownership instead of running kubectl with sudo.
What kubeadm init created, and what each piece does
Right after kubeadm init, this is what my single node looked like:
# On node-1
$ kubectl get nodes
NAME     STATUS     ROLES           AGE   VERSION
node-1   NotReady   control-plane   33s   v1.36.5
$ kubectl get pods -A
NAMESPACE     NAME                             READY   STATUS    RESTARTS   AGE
kube-system   coredns-589f44dc88-5p5b8         0/1     Pending   0          21s
kube-system   coredns-589f44dc88-7t7b5         0/1     Pending   0          21s
kube-system   etcd-node-1                      1/1     Running   0          36s
kube-system   kube-apiserver-node-1            1/1     Running   0          36s
kube-system   kube-controller-manager-node-1   1/1     Running   0          36s
kube-system   kube-proxy-br2bt                 1/1     Running   0          21s
kube-system   kube-scheduler-node-1            1/1     Running   0          36s
The node is NotReady and CoreDNS is Pending because there is no network plugin yet. That’s expected, and installing one fixes both.
The control plane
- kube-apiserver is the front desk. Every request goes through it (
kubectl, kubelet, the scheduler, the controllers). It authenticates and validates the caller, then reads or writes state. It is the only component that talks to etcd directly. - etcd is the record book: a distributed key-value store holding all cluster state, such as every Deployment, Pod and Secret. It uses the Raft algorithm to agree on writes across members, which is why high availability needs three of them. The
-node-1suffix onetcd-node-1is just kubeadm appending the hostname to static pod names. - kube-scheduler assigns pods to nodes. It watches for pods with no node yet, filters nodes by resources, taints and affinity, picks the best one, and records the choice through the API server. It doesn’t start anything.
- kube-controller-manager runs many control loops in one process. Each compares desired state with actual state and acts: the Deployment controller creates ReplicaSets, the ReplicaSet controller creates pods, the node controller notices dead nodes. It also gives each node its slice of the pod address range.
On every node
- kubelet is the node agent, running as a systemd service rather than a pod. It reads the static pod manifests in
/etc/kubernetes/manifeststhat start the control plane, and it asks containerd to run every other pod. - kube-proxy makes Services work. A Service has a virtual IP that no machine owns, so kube-proxy watches Services and endpoints and programs iptables rules that spread traffic across the real pod IPs. This is where the
br_netfiltersysctls from earlier matter. - CoreDNS is the cluster’s DNS server. It lets pods resolve names like
my-service.my-namespace.svc.cluster.localto the Service’s virtual IP. It is a regular pod, so it can’t start until networking exists.
CNI and Flannel
Kubernetes requires that every pod gets its own IP and can reach every other pod directly, on any node, without NAT. It doesn’t implement that itself. It hands the job to a plugin through the Container Network Interface (CNI).
When a pod starts, kubelet asks containerd to create it, and containerd creates an empty network namespace for it. containerd then reads the CNI config from /etc/cni/net.d and runs the plugin binary from /opt/cni/bin with an ADD command. The plugin creates a virtual cable (a veth pair) between the pod’s namespace and the node, assigns the pod an IP, and sets up routes. When the pod is deleted, the runtime calls the plugin again to clean up. With no CNI config present, kubelet reports the node’s network as not ready, which is exactly the state shown above.
Flannel is the simplest popular CNI. It runs as a DaemonSet with one pod per node, hands each node a slice of the 10.244.0.0/16 pod range I passed to kubeadm init, and by default carries cross-node traffic over VXLAN, which wraps pod packets inside ordinary UDP packets. It doesn’t enforce NetworkPolicy, which is one reason I plan to use Cilium for the real cluster.
How they fit together
When I run kubectl create deployment hello --image=nginx:
- kubectl sends the request to the API server, which stores it in etcd.
- The controller manager sees the new Deployment and creates a ReplicaSet, then a Pod object.
- The scheduler sees the unassigned pod and picks a node.
- kubelet on that node sees the assignment and asks containerd to start the container, which calls the CNI plugin to give it an IP.
- If the pod is exposed as a Service, kube-proxy adds the rules and CoreDNS answers for its name.
Installing Flannel
# On node-1
$ kubectl apply -f https://github.com/flannel-io/flannel/releases/latest/download/kube-flannel.yml
namespace/kube-flannel created
serviceaccount/flannel created
clusterrole.rbac.authorization.k8s.io/flannel created
clusterrolebinding.rbac.authorization.k8s.io/flannel created
configmap/kube-flannel-cfg created
daemonset.apps/kube-flannel-ds created
$ kubectl get pods -A -w
Applying the manifest created a kube-flannel namespace and a DaemonSet. Watching the pods, the Flannel pod went from Init:1/2 through PodInitializing to Running, and the two CoreDNS pods moved from Pending to ContainerCreating as it came up:
kube-flannel   kube-flannel-ds-swrqb      0/1   Init:1/2            0   12s
kube-flannel   kube-flannel-ds-swrqb      0/1   PodInitializing     0   17s
kube-flannel   kube-flannel-ds-swrqb      1/1   Running             0   17s
kube-system    coredns-589f44dc88-5p5b8   0/1   Pending             0   5m26s
kube-system    coredns-589f44dc88-5p5b8   0/1   ContainerCreating   0   5m26s
That’s the CNI doing its job. Until a network plugin was installed, the node stayed NotReady, which kept CoreDNS from being scheduled.
CoreDNS stuck in ContainerCreating
After Flannel started, the two CoreDNS pods sat in ContainerCreating for 14 minutes:
# On node-1
$ kubectl get pods -A
...
kube-system    coredns-589f44dc88-5p5b8         0/1     ContainerCreating   0          14m
kube-system    coredns-589f44dc88-7t7b5         0/1     ContainerCreating   0          14m
kubectl describe on one of them had the answer in its events:
# On node-1
$ kubectl -n kube-system describe pod coredns-589f44dc88-5p5b8 | tail -15
...
  Warning  FailedCreatePodSandBox  10m  kubelet  Failed to create pod sandbox: ... plugin type="loopback" failed (add): failed to find plugin "loopback" in path [/usr/lib/cni]
  Warning  FailedCreatePodSandBox  10m  kubelet  Failed to create pod sandbox: ... plugin type="flannel" failed (add): failed to find plugin "flannel" in path [/usr/lib/cni]
...
  Normal   SandboxChanged          47s (x586 over 10m)  kubelet  Pod sandbox changed, it will be killed and re-created.
The cause was a mismatch between two directories. When containerd creates a pod sandbox, it reads the network config from /etc/cni/net.d, where Flannel writes its config, and then looks for the plugin executables named in that config, such as flannel and loopback, in its CNI bin_dir. The default config that Debian’s containerd package generated back in the containerd step set bin_dir = "/usr/lib/cni", but Flannel and the kubernetes-cni package install their binaries into /opt/cni/bin. containerd looked in the wrong place, couldn’t find any plugin, and failed every sandbox creation, while kubelet kept retrying.
The fix was to point containerd at the right directory, restart it, and recreate the stuck pods:
# On node-1: point containerd at the directory where the CNI plugins actually are
$ sudo sed -i 's#bin_dir = "/usr/lib/cni"#bin_dir = "/opt/cni/bin"#' /etc/containerd/config.toml

# Restart containerd so it reads the new config
$ sudo systemctl restart containerd

# Delete the stuck CoreDNS pods so they're recreated right away
$ kubectl -n kube-system delete pod -l k8s-app=kube-dns

# CoreDNS comes up within seconds
$ kubectl get pods -A
NAMESPACE      NAME                             READY   STATUS    RESTARTS   AGE
kube-flannel   kube-flannel-ds-swrqb            1/1     Running   0          12m
kube-system    coredns-589f44dc88-k95ck         1/1     Running   0          17s
kube-system    coredns-589f44dc88-rpm47         1/1     Running   0          17s
...
The other pods were never affected because the control plane pods, kube-proxy and Flannel itself use the host’s network instead of a pod network, so they never go through the CNI plugin. CoreDNS was the first pod that needed one. This is the kind of integration detail that k3s hides by bundling its own containerd and CNI binaries, and that a kubeadm build leaves to you.
Removing the taint and running a test workload
kubeadm taints control plane nodes with node-role.kubernetes.io/control-plane:NoSchedule so regular pods stay off them. On a one-node cluster that would leave nowhere to run anything, so I removed the taint (the trailing - means remove) and created a test deployment:
# On node-1
$ kubectl taint nodes --all node-role.kubernetes.io/control-plane-
node/node-1 untainted
$ kubectl create deployment hello --image=nginx
deployment.apps/hello created
$ kubectl get pods -A
NAMESPACE      NAME                             READY   STATUS    RESTARTS   AGE
default        hello-558494cd6d-967z4           1/1     Running   0          14s
...
The hello pod was Running 14 seconds after I created it. That exercises the whole path: the scheduler placed it, containerd pulled an arm64 nginx image, and the CNI plugin gave it a pod network.
Testing Services and DNS
A running nginx pod only proves scheduling and pod networking. To test Services and DNS as well, I exposed it as a Service and curled it by name from a throwaway pod:
# On node-1
$ kubectl expose deployment hello --port=80
service/hello exposed
$ kubectl run curl --rm -it --image=curlimages/curl --restart=Never -- curl -s http://hello
<!DOCTYPE html>
<html>
<head>
<title>Welcome to nginx!</title>
...
</html>
pod "curl" deleted from default namespace
That one request exercised most of what I’d set up. CoreDNS resolved the name hello to the Service’s virtual IP, kube-proxy’s forwarding rules sent the traffic to the nginx pod’s IP, and the packets crossed the Flannel network between the two pods. It also confirms the br_netfilter and ip_forward settings from earlier are doing their job.
How much memory does it use?
I took a baseline right after the first boot, before installing anything, and measured again with the control plane, Flannel, CoreDNS and kube-proxy running:
# On node-1: before Kubernetes (fresh Raspberry Pi OS install, zram swap still on)
$ free -h
               total        used        free      shared  buff/cache   available
Mem:           4.0Gi       429Mi       2.8Gi        34Mi       836Mi       3.5Gi
Swap:          2.0Gi          0B       2.0Gi

# With the control plane running, Flannel and CoreDNS up, and swap disabled
$ free -h
               total        used        free      shared  buff/cache   available
Mem:           4.0Gi       1.0Gi       607Mi       110Mi       2.5Gi       2.9Gi
Swap:             0B          0B          0B
The column that matters is available, not free. Linux uses idle RAM as cache and gives it back on demand, so a low free number is normal. Running Kubernetes added roughly 600MB of used memory: etcd, the API server, the controller manager, the scheduler, kubelet, containerd, kube-proxy, Flannel and CoreDNS together. That leaves about 2.9Gi available on a 4GB Pi.
This is a single snapshot of an idle cluster. I’ll measure again after the rebuild.
Installing Argo CD and measuring its cost
I installed Argo CD with the upstream manifests. The --server-side flag is required because some of its CRDs are too large for a normal kubectl apply:
# On node-1
$ kubectl create namespace argocd
$ kubectl apply -n argocd --server-side --force-conflicts -f https://raw.githubusercontent.com/argoproj/argo-cd/stable/manifests/install.yaml
Right after the pods came up (two were still starting), free -h showed 1.4Gi used and 2.5Gi available. The ps output I took at the same time showed something I hadn’t expected: the Raspberry Pi desktop (labwc, wf-panel-pi, pcmanfm) was running, using about 270MiB of resident memory in total. The OS I’d flashed was the desktop edition, not Lite.
I turned the desktop off without reflashing, rebooted, and scaled down two Argo CD components I don’t need. Dex only provides SSO logins, and I log in with the built-in admin account. The notifications controller is only useful once notifications are configured.
# On node-1: stop booting into the desktop, then reboot
$ sudo systemctl set-default multi-user.target
$ sudo reboot

# (reconnected over SSH after the reboot)

# Scale down the two Argo CD components I don't need
$ kubectl -n argocd scale deployment argocd-dex-server argocd-notifications-controller --replicas=0
deployment.apps/argocd-dex-server scaled
deployment.apps/argocd-notifications-controller scaled
A few minutes later:
# On node-1: still headless, with no desktop process running
$ systemctl get-default
multi-user.target
$ pgrep -a labwc

# Memory use
$ free -h
               total        used        free      shared  buff/cache   available
Mem:           4.0Gi       1.0Gi       1.8Gi        19Mi       1.3Gi       2.9Gi
Swap:             0B          0B          0B

# The biggest processes by resident memory
$ ps -eo rss,comm --sort=-rss | head -15
  RSS COMMAND
378336 kube-apiserver
116688 argocd-server
113152 kube-controller
102064 argocd-applicat
 95248 argocd-applicat
 94640 kubelet
 91952 argocd-repo-ser
 88768 etcd
 77088 containerd
 60736 kube-scheduler
 59888 coredns
 59824 coredns
 45984 kube-proxy
 45840 flanneld
ps truncates names to 15 characters, so the two argocd-applicat lines are the application controller and the ApplicationSet controller. Here are the three snapshots side by side:
| State | Used | Available |
|---|---|---|
| Control plane + Flannel, desktop running | 1.0Gi | 2.9Gi |
| Plus Argo CD (all components, still starting), desktop running | 1.4Gi | 2.5Gi |
| Argo CD without Dex and notifications, desktop off | 1.0Gi | 2.9Gi |
I changed several things between the second and third snapshots, so I can’t split the savings precisely between the desktop and the two Argo CD components. What the numbers do show is that a headless node running the control plane, Flannel and a trimmed Argo CD uses about 1.0Gi and leaves 2.9Gi available.
The biggest single process is kube-apiserver at about 370MiB, down from about 480MiB right after the Argo CD install. The four Argo CD processes in the list add up to roughly 400MiB of resident memory, and Redis is smaller than anything shown. One more thing worth remembering for the HA design: Argo CD runs once for the whole cluster, while the control plane components run on every control plane node, so Argo CD’s cost isn’t multiplied by three.
A cleaner comparison
To separate the pieces, I removed Argo CD again and measured the headless node on its own:
# On node-1: remove Argo CD again
$ kubectl delete -n argocd -f https://raw.githubusercontent.com/argoproj/argo-cd/stable/manifests/install.yaml
$ kubectl delete namespace argocd

# Memory use of the headless node on its own
$ free -h
               total        used        free      shared  buff/cache   available
Mem:           4.0Gi       911Mi       2.1Gi        17Mi       1.0Gi       3.1Gi
Swap:             0B          0B          0B
$ ps -eo rss,comm --sort=-rss | head -15
  RSS COMMAND
405376 kube-apiserver
109648 kube-controller
 94160 etcd
 93648 kubelet
 73424 containerd
 60704 kube-scheduler
 60544 coredns
 60224 coredns
 46400 flanneld
 45744 kube-proxy
...| State | Used | Available |
|---|---|---|
| Control plane + Flannel, desktop running | 1.0Gi | 2.9Gi |
| Control plane + Flannel, headless | 911Mi | 3.1Gi |
| Plus Argo CD without Dex and notifications, headless | 1.0Gi | 2.9Gi |
free rounds to 0.1Gi, so these are rough, but they point the same way. The desktop cost somewhere around 100 to 200MiB of real memory, not the 270MiB I got by adding up its resident sizes, and the trimmed Argo CD cost about the same, roughly 100 to 200MiB, not the 400MiB its processes appear to add up to. Summing RSS overstates because shared pages are counted in every process that maps them.
Per-process numbers also wander on their own. kube-apiserver was 378MB with Argo CD installed and 405MB without it, so I wouldn’t read much into differences of a few tens of MiB. The headless numbers without Argo CD, 911Mi used and 3.1Gi available, are the baseline I’ll compare Cilium against.
Swapping Flannel and kube-proxy for Cilium
Flannel was the simple choice for the first run, but I want the industry-representative stack for the real cluster, so I rebuilt the node with Cilium. I reset and re-initialized instead of swapping the CNI in place, because Flannel leaves its config, interfaces and iptables rules behind. Cilium can also replace kube-proxy, so kubeadm init has to skip the kube-proxy addon.
# On node-1: tear down the old cluster, then reboot to clear Flannel's
# network interfaces and iptables rules
$ sudo kubeadm reset -f
$ sudo rm -rf /etc/cni/net.d $HOME/.kube
$ sudo reboot

# (reconnected over SSH after the reboot)

# Download and install the Cilium CLI for arm64, verifying its checksum
$ CILIUM_CLI_VERSION=$(curl -s https://raw.githubusercontent.com/cilium/cilium-cli/main/stable.txt)
$ CLI_ARCH=arm64
$ curl -L --fail --remote-name-all https://github.com/cilium/cilium-cli/releases/download/${CILIUM_CLI_VERSION}/cilium-linux-${CLI_ARCH}.tar.gz{,.sha256sum}
$ sha256sum --check cilium-linux-${CLI_ARCH}.tar.gz.sha256sum
$ sudo tar xzvfC cilium-linux-${CLI_ARCH}.tar.gz /usr/local/bin
$ rm cilium-linux-${CLI_ARCH}.tar.gz{,.sha256sum}

# Re-initialize the cluster, skipping kube-proxy because Cilium will replace it
$ sudo kubeadm init --skip-phases=addon/kube-proxy --apiserver-advertise-address=10.0.0.150 --pod-network-cidr=10.244.0.0/16

# Set up kubectl for my user
$ mkdir -p $HOME/.kube
$ sudo cp /etc/kubernetes/admin.conf $HOME/.kube/config
$ sudo chown $(id -u):$(id -g) $HOME/.kube/config

# Let this node run ordinary workloads by removing the control-plane taint
$ kubectl taint nodes --all node-role.kubernetes.io/control-plane-

# Install Cilium, pointing it at the API server directly because there's no kube-proxy
$ cilium install --version 1.19.5 \
  --set kubeProxyReplacement=true \
  --set k8sServiceHost=10.0.0.150 \
  --set k8sServicePort=6443 \
  --set ipam.mode=kubernetes

# Wait until Cilium reports healthy
$ cilium status --wait
Three of those settings matter. --skip-phases=addon/kube-proxy stops kubeadm from installing kube-proxy, whose iptables rules would conflict with Cilium’s eBPF service routing. k8sServiceHost and k8sServicePort point Cilium directly at the API server, because with no kube-proxy the kubernetes Service isn’t reachable until Cilium itself is running. And ipam.mode=kubernetes keeps pod addresses inside the 10.244.0.0/16 range kubeadm allocated, because Cilium’s default pod range (10.0.0.0/8) would overlap my 10.0.0.x home network.
The check that Cilium had taken over:
# On node-1
$ kubectl -n kube-system exec ds/cilium -- cilium-dbg status | grep KubeProxyReplacement
KubeProxyReplacement:    True   [wlan0    10.0.0.150 <IPv6 addresses omitted> (Direct Routing)]
There’s no kube-proxy pod in the list any more, and a cilium-envoy pod appeared that I hadn’t seen before. A few minutes after the install:
# On node-1
$ kubectl get pods -A
NAMESPACE     NAME                              READY   STATUS    RESTARTS        AGE
kube-system   cilium-7wrqm                      1/1     Running   0               7m4s
kube-system   cilium-envoy-6vhtz                1/1     Running   0               7m4s
kube-system   cilium-operator-9fd48fcf7-kmc4b   1/1     Running   2 (5m24s ago)   7m4s
kube-system   coredns-589f44dc88-fbr55          1/1     Running   0               7m11s
kube-system   coredns-589f44dc88-h58xk          1/1     Running   0               7m11s
kube-system   etcd-node-1                       1/1     Running   3               7m18s
kube-system   kube-apiserver-node-1             1/1     Running   3               7m18s
kube-system   kube-controller-manager-node-1    1/1     Running   5 (6m9s ago)    7m18s
kube-system   kube-scheduler-node-1             1/1     Running   6 (5m23s ago)   7m18s
The restart counts looked alarming at first. Two and a half minutes in, the scheduler had restarted 6 times and the controller manager 5, and CoreDNS was still 0/1. Four minutes later the counts hadn’t moved, CoreDNS was 1/1, and the most recent restarts all dated from the first minute or two after the pods started. My guess is startup churn while the SD card was busy pulling and unpacking Cilium’s images, but I didn’t capture events at the time, so I can’t confirm it.
What Cilium costs
# On node-1
$ free -h
               total        used        free      shared  buff/cache   available
Mem:           4.0Gi       1.1Gi       508Mi        20Mi       2.5Gi       2.9Gi
Swap:             0B          0B          0B
$ ps -eo rss,comm --sort=-rss | head -15
  RSS COMMAND
351328 kube-apiserver
185824 cilium-agent
106960 kube-controller
106144 cilium-operator
 91808 kubelet
 74064 containerd
 73840 etcd
 59472 coredns
 58656 coredns
 57504 kube-scheduler
 50960 cilium-envoy
...| State | Used | Available |
|---|---|---|
| Flannel + kube-proxy, headless | 911Mi | 3.1Gi |
| Cilium replacing kube-proxy, headless | 1.1Gi | 2.9Gi |
Cilium cost roughly 150 to 250MiB more than Flannel plus kube-proxy. The process list agrees: the agent, operator and Envoy add up to about 335MiB of resident memory, and the Flannel daemon plus kube-proxy they replaced were about 90MiB, a net difference near 250MiB.
For the HA design, that cost isn’t spread evenly. The Cilium agent and Envoy run on every node, about 230MiB of resident memory each, while the operator runs once for the cluster (I haven’t checked how many replicas the HA install will run). By comparison, Flannel and kube-proxy came to about 90MiB per node.
How slow is the SD card for etcd?
After the Cilium install, the control plane pods had restarted several times, and I suspected the SD card. etcd syncs every write to disk before confirming it, so its disk latency is the thing to measure. etcd exposes it on a local metrics port as a histogram of WAL fsync times. Here is everything since etcd started, which includes the Cilium install:
# On node-1
$ curl -s http://127.0.0.1:2381/metrics | grep etcd_disk_wal_fsync_duration_seconds_bucket
etcd_disk_wal_fsync_duration_seconds_bucket{le="0.001"} 417
etcd_disk_wal_fsync_duration_seconds_bucket{le="0.002"} 526
etcd_disk_wal_fsync_duration_seconds_bucket{le="0.004"} 2014
etcd_disk_wal_fsync_duration_seconds_bucket{le="0.008"} 2530
etcd_disk_wal_fsync_duration_seconds_bucket{le="0.016"} 2642
etcd_disk_wal_fsync_duration_seconds_bucket{le="0.032"} 2680
etcd_disk_wal_fsync_duration_seconds_bucket{le="0.064"} 2701
etcd_disk_wal_fsync_duration_seconds_bucket{le="0.128"} 2716
etcd_disk_wal_fsync_duration_seconds_bucket{le="0.256"} 2731
etcd_disk_wal_fsync_duration_seconds_bucket{le="0.512"} 2739
etcd_disk_wal_fsync_duration_seconds_bucket{le="1.024"} 2741
etcd_disk_wal_fsync_duration_seconds_bucket{le="2.048"} 2748
etcd_disk_wal_fsync_duration_seconds_bucket{le="4.096"} 2750
etcd_disk_wal_fsync_duration_seconds_bucket{le="8.192"} 2751
etcd_disk_wal_fsync_duration_seconds_bucket{le="+Inf"} 2753
The average was 23.56ms over 2,753 syncs. That average hides the shape: most syncs were fast, but a small number were very slow, including 12 over a second and 2 over eight seconds. To see whether that was the install or the card itself, I took two snapshots five minutes apart on an idle cluster and subtracted them:
# On node-1
$ snap() { curl -s http://127.0.0.1:2381/metrics | grep -E '^etcd_disk_wal_fsync_duration_seconds_(bucket|count)'; }
$ snap > /tmp/a.txt; sleep 300; snap > /tmp/b.txt
$ paste /tmp/a.txt /tmp/b.txt | awk '{print $1, $4-$2}'
etcd_disk_wal_fsync_duration_seconds_bucket{le="0.001"} 53
etcd_disk_wal_fsync_duration_seconds_bucket{le="0.002"} 73
etcd_disk_wal_fsync_duration_seconds_bucket{le="0.004"} 580
etcd_disk_wal_fsync_duration_seconds_bucket{le="0.008"} 680
etcd_disk_wal_fsync_duration_seconds_bucket{le="0.016"} 686
etcd_disk_wal_fsync_duration_seconds_bucket{le="0.032"} 686
etcd_disk_wal_fsync_duration_seconds_bucket{le="0.064"} 686
etcd_disk_wal_fsync_duration_seconds_bucket{le="0.128"} 687
etcd_disk_wal_fsync_duration_seconds_bucket{le="0.256"} 687
etcd_disk_wal_fsync_duration_seconds_bucket{le="0.512"} 688
etcd_disk_wal_fsync_duration_seconds_bucket{le="1.024"} 688
etcd_disk_wal_fsync_duration_seconds_bucket{le="2.048"} 688
etcd_disk_wal_fsync_duration_seconds_bucket{le="4.096"} 688
etcd_disk_wal_fsync_duration_seconds_bucket{le="8.192"} 688
etcd_disk_wal_fsync_duration_seconds_bucket{le="+Inf"} 688
etcd_disk_wal_fsync_duration_seconds_count 688
The percentiles below are my interpolation between histogram buckets, so treat them as estimates:
| Fsync time | Since etcd started (includes the Cilium install) | Idle 5-minute window |
|---|---|---|
| Median | about 3ms | about 3ms |
| 90th percentile | about 8ms | about 6ms |
| 95th percentile | about 14ms | about 7ms |
| 99th percentile | about 200ms | about 9ms |
| Slowest | over 8 seconds | between 256ms and 512ms |
The guidance I remember from etcd’s documentation is that the 99th percentile should stay under about 10ms. At idle, the SD card just meets that, with little headroom. The bad tail appeared during busy periods like the install, which is also when the control plane pods restarted. That fits, but I never captured events to prove the connection.
So the card handles a quiet etcd and struggles when something else is hammering it. Routine operations like image pulls, upgrades and Argo CD syncs will keep producing those bursts. I haven’t yet run the fio disk benchmark to compare this card against a better one or against NVMe.
How much does the SD card get written?
Latency is only half of the SD card question. Wear depends on how many bytes get written, and the kernel keeps a running count of sectors written per disk. Since boot, it showed this:
# On node-1
$ awk '{printf "%.0f MiB written since boot\n", $7*512/1048576}' /sys/block/mmcblk0/stat; uptime -p
2102 MiB written since boot
up 37 minutes
That number is misleading, because it includes the whole rebuild: downloading the Cilium CLI, running kubeadm init, and pulling and unpacking images. To get a steady-state rate, I took two readings five minutes apart on an idle cluster:
# On node-1
$ a=$(awk '{print $7}' /sys/block/mmcblk0/stat); sleep 300; b=$(awk '{print $7}' /sys/block/mmcblk0/stat)
$ awk -v a=$a -v b=$b 'BEGIN{printf "%d KiB written in 5 min, about %.2f GiB/day at this rate\n", (b-a)*512/1024, (b-a)*512*288/1073741824}'
43052 KiB written in 5 min, about 11.82 GiB/day at this rate
That is about 42MiB every five minutes, or roughly 12GiB a day, on a cluster that is doing nothing. It counts everything that writes to the card, not just etcd, and real use only adds to it. At that rate the card absorbs more than 4TiB a year.
To see who was doing the writing, I added up the bytes each process had written to storage since it started:
# On node-1
$ sudo bash -c 'for p in /proc/[0-9]*; do w=$(awk "/^write_bytes/{print \$2}" $p/io 2>/dev/null); n=$(awk "/^Name:/{print \$2}" $p/status 2>/dev/null); [ -n "$w" ] && echo "$((w/1048576)) MiB $n"; done | sort -rn | head -10'
10009 MiB etcd
1600 MiB containerd
257 MiB jbd2/mmcblk0p2-8
223 MiB systemd
80 MiB containerd-shim
2 MiB kubelet
0 MiB wpa_supplicant
0 MiB wireplumber
0 MiB watchdogd
0 MiB systemd-udevd
etcd accounts for roughly four-fifths of the writes in that list. containerd’s 1,600MiB is mostly image pulls from the install, which won’t repeat at that rate. jbd2 is the ext4 filesystem journal, and systemd includes the system journal, so tuning log settings wouldn’t change much. The main writer is etcd, which means moving only etcd’s data directory onto better storage would take most of the wear off the SD card.
Eighteen hours later, and a disk cleanup
The cluster had been up about 18 hours on the SD card, and the restart counts hadn’t moved since the first few minutes after the Cilium install. After I rebooted the node, each count went up by exactly one, so the early restarts really were startup churn and not ongoing instability:
# On node-1
$ kubectl get nodes
NAME     STATUS   ROLES           AGE   VERSION
node-1   Ready    control-plane   18h   v1.36.5
$ kubectl get pods -A
NAMESPACE     NAME                              READY   STATUS    RESTARTS        AGE
kube-system   cilium-7wrqm                      1/1     Running   1 (4m12s ago)   18h
kube-system   cilium-envoy-6vhtz                1/1     Running   1 (4m12s ago)   18h
kube-system   cilium-operator-9fd48fcf7-kmc4b   1/1     Running   3 (4m12s ago)   18h
kube-system   coredns-589f44dc88-fbr55          1/1     Running   1 (4m12s ago)   18h
kube-system   coredns-589f44dc88-h58xk          1/1     Running   1 (4m12s ago)   18h
kube-system   etcd-node-1                       1/1     Running   4 (4m12s ago)   18h
kube-system   kube-apiserver-node-1             1/1     Running   4 (4m12s ago)   18h
kube-system   kube-controller-manager-node-1    1/1     Running   6 (4m12s ago)   18h
kube-system   kube-scheduler-node-1             1/1     Running   7 (4m12s ago)   18h
The 16GB card had filled to 83% because I’d flashed the desktop edition of the OS. I removed the ten rpd-* desktop metapackages, ran autoremove, and rebooted. Used space dropped from 12G to 9.7G:
# On node-1
$ df -h /
Filesystem      Size  Used Avail Use% Mounted on
/dev/mmcblk0p2   15G   12G  2.4G  83%

# After purging the desktop packages
$ df -h /
Filesystem      Size  Used Avail Use% Mounted on
/dev/mmcblk0p2   15G  9.7G  3.8G  73%
Three things stood out in what was left:
# On node-1
$ sudo find /var -maxdepth 1 -type f -size +100M -exec ls -lh {} +
-rw------- 1 root root 2.0G Oct 11 00:42 /var/swap
$ sudo du -xh /var/lib --max-depth=1 | sort -h | tail -6
4.2M    /var/lib/aspell
40M     /var/lib/dpkg
151M    /var/lib/apt
252M    /var/lib/etcd
3.5G    /var/lib/containerd
3.9G    /var/lib
There was a 2GB swap file at /var/swap. I had masked the systemd units that use it, but masking doesn’t delete the file, so it just sat there. containerd’s image store was 3.5G and still held images from my earlier experiments, because deleting a pod doesn’t delete its image. And etcd’s own data directory, after 18 hours, was only 252MB.
The experiment images (Argo CD, nginx, Dex, Flannel, Redis, curl) came to only about 380MiB compressed, so most of the 3.5G is what the cluster actually uses. The swap file was the real prize. With swap off and no swap line in /etc/fstab, I deleted it:
# On node-1: delete the leftover swap file
$ sudo rm /var/swap

# It's gone, swap is still off, and the card has room
$ ls -lh /var/swap
ls: cannot access '/var/swap': No such file or directory
$ swapon --show
$ df -h /
Filesystem      Size  Used Avail Use% Mounted on
/dev/mmcblk0p2   15G  7.8G  5.7G  58%
That took the card from 83% full to 58%.
Adding two Lite nodes
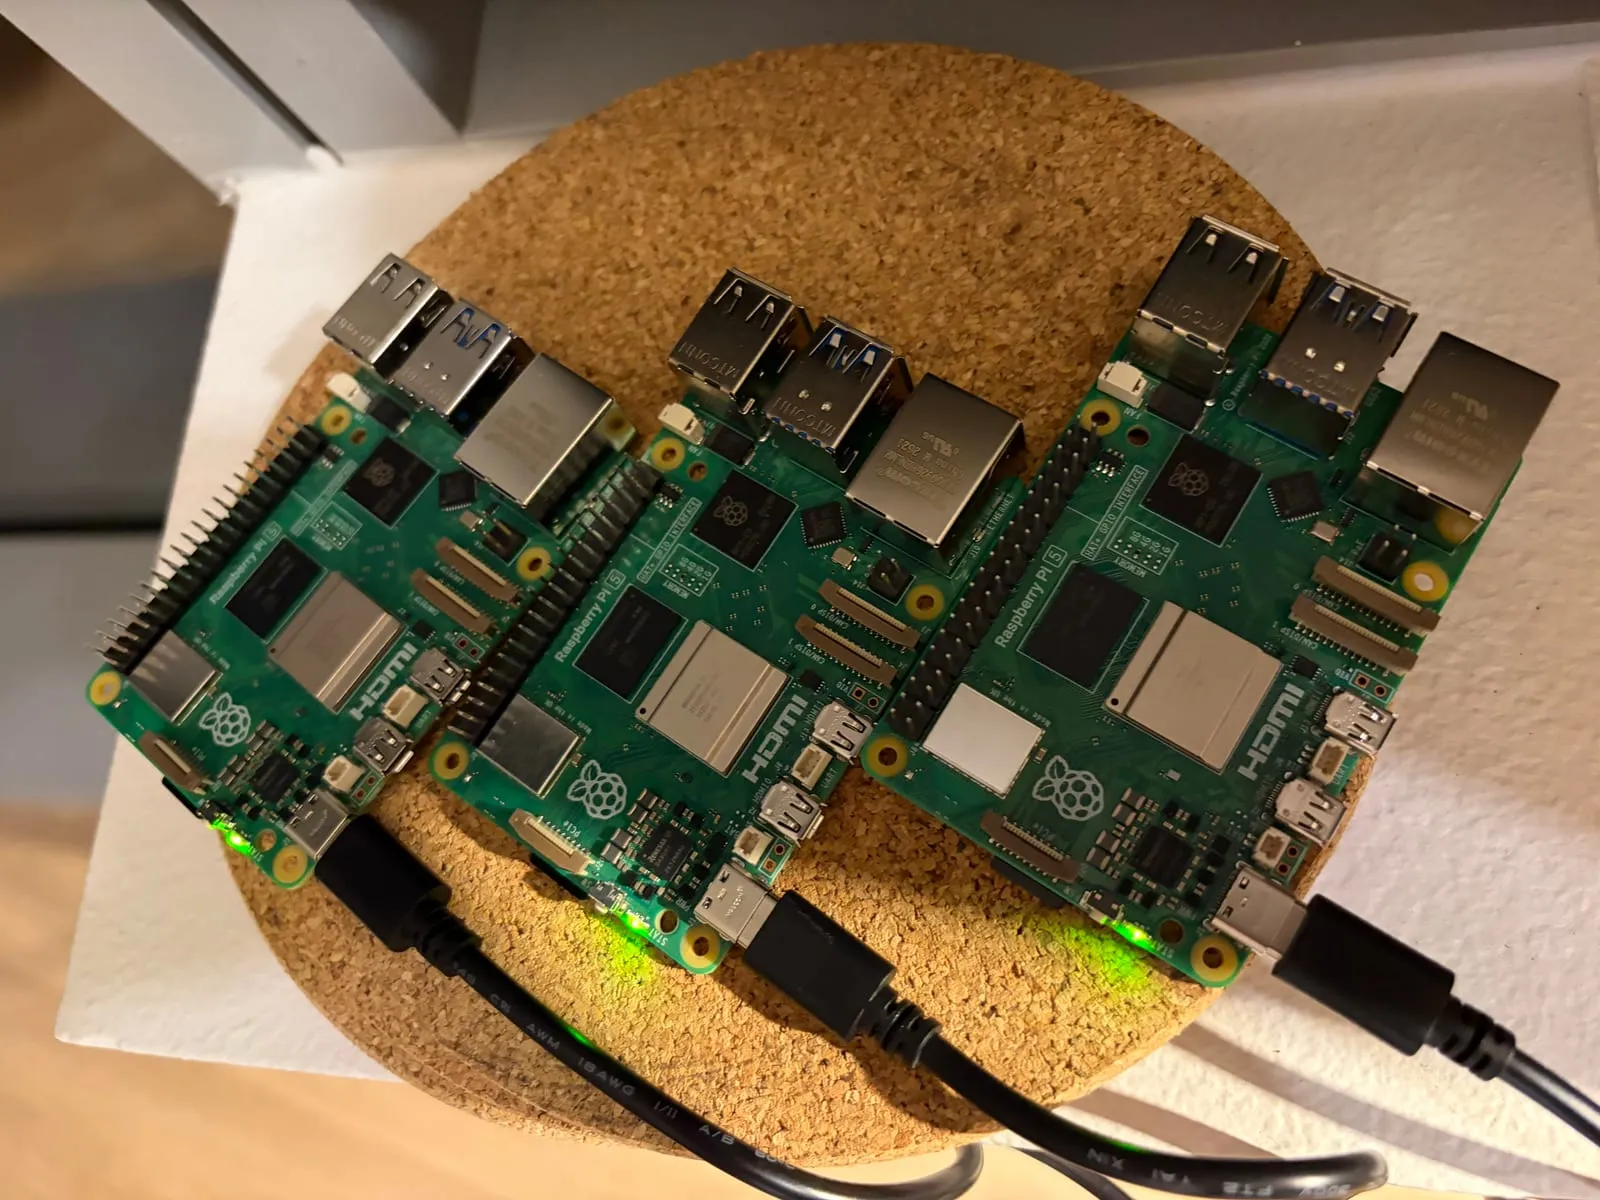
With node-1 running as a single-node test, I flashed two more Pis, node-2 and node-3, with Raspberry Pi OS Lite (64-bit) on 16GB SD cards. They stay on Wi-Fi with temporary DHCP addresses until the Ethernet cables arrive.
What a fresh Lite install looks like
# On node-2: OS and kernel
$ hostname; uname -r; grep PRETTY_NAME /etc/os-release
node-2
6.18.50+rpt-rpi-2712
PRETTY_NAME="Debian GNU/Linux 13 (trixie)"

# Memory, swap and the leftover swap file
$ free -h; swapon --show; ls -lh /var/swap
               total        used        free      shared  buff/cache   available
Mem:           4.0Gi       213Mi       3.3Gi        12Mi       530Mi       3.7Gi
Swap:          2.0Gi          0B       2.0Gi
NAME       TYPE      SIZE USED PRIO
/dev/zram0 partition   2G   0B  100
-rw------- 1 root root 157M Oct  5 17:27 /var/swap

# The kernel's cgroup flags
$ grep -o 'cgroup[a-z_]*=[a-z0-9]*' /proc/cmdline
cgroup_disable=memory

# Disk use
$ df -h /
Filesystem      Size  Used Avail Use% Mounted on
/dev/mmcblk0p2   15G  2.0G   12G  15% /
The difference from the desktop image is large. The node idles at 213Mi of memory, against 429Mi on node-1 before Kubernetes, and a fresh install uses 2.0G of disk instead of 12G. It has the same kernel as node-1. It also starts from the same defaults: the firmware disables the memory cgroup, and zram swap is on, along with a small swap file.
Prep and verification
The prep block is the same work I did by hand on node-1, written so it can be rerun safely. It adds the cgroup flags only if they’re missing, turns swap off and masks the units that bring it back, removes the swap file, and sets the kernel modules and sysctls:
# On node-2: enable the memory cgroup, but only if the flags aren't already there
$ grep -q cgroup_enable=memory /boot/firmware/cmdline.txt || sudo sed -i '1 s/$/ cgroup_memory=1 cgroup_enable=memory/' /boot/firmware/cmdline.txt

# Turn swap off now, and mask the units that would turn it back on at boot
$ sudo swapoff -a
$ sudo systemctl mask dev-zram0.swap systemd-zram-setup@zram0.service rpi-zram-writeback.timer
$ sudo rm -f /var/swap

# Load the kernel modules Kubernetes networking needs, now and at every boot
$ printf 'overlay\nbr_netfilter\n' | sudo tee /etc/modules-load.d/k8s.conf

# Set the networking sysctls
$ printf 'net.bridge.bridge-nf-call-iptables  = 1\nnet.bridge.bridge-nf-call-ip6tables = 1\nnet.ipv4.ip_forward                 = 1\n' | sudo tee /etc/sysctl.d/k8s.conf

# Reboot so everything takes effect
$ sudo reboot

# (reconnected over SSH after the reboot)

# Swap should be off, with no swap file left behind
$ swapon --show
$ ls -lh /var/swap
ls: cannot access '/var/swap': No such file or directory

# The memory controller should now be listed
$ cat /sys/fs/cgroup/cgroup.controllers
cpuset cpu io memory pids

# Both kernel modules should be loaded
$ lsmod | grep -E 'overlay|br_netfilter'
br_netfilter           65536  0
bridge                344064  1 br_netfilter
overlay               180224  0
ipv6                  622592  40 bridge,br_netfilter

# Both sysctls should read 1
$ sysctl net.bridge.bridge-nf-call-iptables net.ipv4.ip_forward
net.bridge.bridge-nf-call-iptables = 1
net.ipv4.ip_forward = 1

# No desktop, and memory use at idle
$ systemctl get-default
multi-user.target
$ free -h
               total        used        free      shared  buff/cache   available
Mem:           4.0Gi       217Mi       3.6Gi        12Mi       169Mi       3.7Gi
Swap:             0B          0B          0B
Swap stayed off and the swap file didn’t come back after the reboot. On the Lite image, masking the units was enough.
containerd 2.x and the Kubernetes packages
On node-1, Debian’s containerd 1.7 caused two problems: a CNI path that didn’t match where Kubernetes installs its plugins, and a runtime warning that kubeadm says will stop working in 1.37. For the new nodes I used containerd.io from Docker’s apt repository, which supports Debian 13 and ships the upstream build. Both nodes came out on containerd v2.4.1. Its generated config is version 4, and the settings that had bitten node-1 are right from the start:
# On node-2: the version installed from Docker's repository
$ containerd --version
containerd containerd v2.4.1 f2551031d7276a770f65f98c9b52e57e7dad07e8

# Generate a fresh config and switch to the systemd cgroup driver
$ containerd config default | sudo tee /etc/containerd/config.toml >/dev/null
$ sudo sed -i 's/SystemdCgroup = false/SystemdCgroup = true/' /etc/containerd/config.toml

# Check the settings that matter
$ grep -n -E '^version|disabled_plugins|SystemdCgroup|bin_dir|sandbox' /etc/containerd/config.toml
1:version = 4
5:disabled_plugins = []
28:      sandbox = 'registry.k8s.io/pause:3.10.2'
76:          sandboxer = 'podsandbox'
89:            SystemdCgroup = true
92:      bin_dirs = ['/opt/cni/bin']
124:    bin_dir = '/opt/containerd/image-verifier/bin'
The CNI plugin path is /opt/cni/bin, where Debian’s package had /usr/lib/cni, and the pause image is the 3.10.2 that kubeadm recommends, where Debian’s had 3.8. The bin_dir on line 124 is a different setting, for image signature verifiers, and has nothing to do with CNI.
Then the same Kubernetes v1.36 packages as node-1, held so a routine upgrade can’t bump them:
# On node-2
$ sudo apt-mark hold kubelet kubeadm kubectl
kubelet set on hold.
kubeadm set on hold.
kubectl set on hold.
$ kubeadm version -o short
v1.36.5
Checking that the new nodes match
Node-3, after running everything:
# On node-3: hostname and kernel
$ echo "== $(hostname) =="; uname -r
== node-3 ==
6.18.50+rpt-rpi-2712

# Swap off, and no swap file
$ swapon --show | wc -l; ls /var/swap 2>&1 | head -1
0
ls: cannot access '/var/swap': No such file or directory

# The memory controller, and no desktop
$ cat /sys/fs/cgroup/cgroup.controllers
cpuset cpu io memory pids
$ systemctl get-default
multi-user.target

# Runtime and Kubernetes versions
$ containerd --version | awk '{print $3}'
v2.4.1
$ systemctl is-active containerd kubelet
active
activating
$ kubeadm version -o short
v1.36.5

# Pre-pulled images, and disk use
$ sudo ctr -n k8s.io images ls -q | grep -vE '^sha256:|@sha256' | wc -l
7
$ df -h / | tail -1
/dev/mmcblk0p2   15G  2.8G   11G  21% /
kubelet shows activating because it restarts in a loop until kubeadm init or join gives it a configuration, which is expected on a node that hasn’t joined a cluster. Seven control plane images were pre-pulled, so the real bootstrap won’t have to download them while the cluster is starting up. That matters because pulling images was when the SD card struggled on node-1.
Moving the nodes onto Ethernet
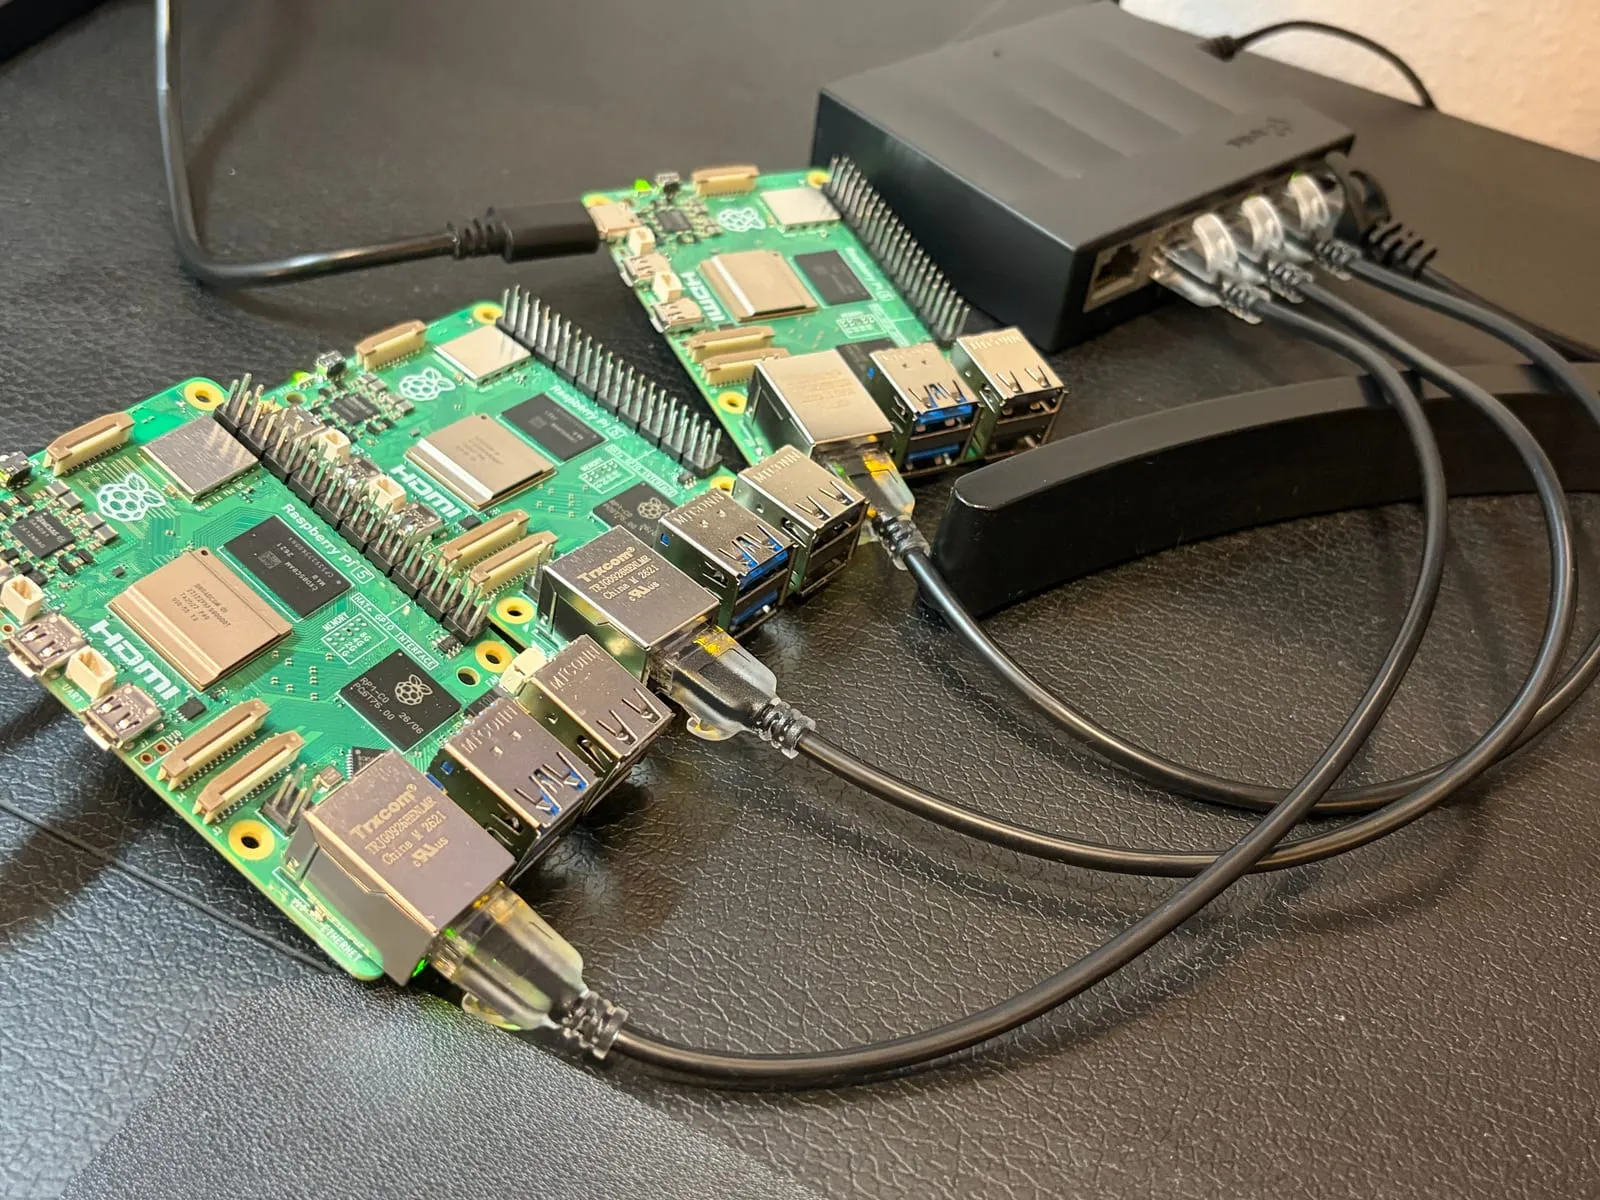
With the cables connected, I checked each Pi’s link. Node-1 negotiated gigabit and picked up a temporary address over Ethernet while Wi-Fi was still configured. Its routing table shows why traffic prefers the cable: the default route over eth0 has a lower metric than the one over wlan0.
# On node-1
$ cat /sys/class/net/eth0/speed
1000
$ ip -br addr show eth0
eth0             UP             10.0.0.149/24 <IPv6 addresses omitted>
$ ip route
default via 10.0.0.1 dev eth0 proto dhcp src 10.0.0.149 metric 100
default via 10.0.0.1 dev wlan0 proto dhcp src 10.0.0.150 metric 600
10.0.0.0/24 dev eth0 proto kernel scope link src 10.0.0.149 metric 100
10.0.0.0/24 dev wlan0 proto kernel scope link src 10.0.0.150 metric 600
...
Each interface has its own MAC address, so a router reservation tied to a Pi’s Wi-Fi MAC doesn’t carry over to its Ethernet MAC. The gateway’s device list showed two entries per Pi, one per interface. The plan was to turn Wi-Fi off on each node and reserve the Ethernet MACs at 10.0.0.150, .151 and .152.
That went less smoothly than expected. Node-1’s old Wi-Fi reservation was still holding 10.0.0.150, and I couldn’t find a way to delete a reservation for an offline device in the gateway’s admin page, so reserving that address for the Ethernet MAC was refused with an “IP has already been reserved for another device” message. The same message appeared when I retried nodes 2 and 3, but there it was misleading: those reservations had already worked. A ping sweep and an SSH check showed the Pis answering on their reserved addresses:
# On my Mac
$ for i in 150 151 152 153 160; do ping -c1 -W1 10.0.0.$i >/dev/null 2>&1 && echo "10.0.0.$i answers" || echo "10.0.0.$i no answer"; done
10.0.0.150 answers
10.0.0.151 answers
10.0.0.152 answers
10.0.0.153 no answer
10.0.0.160 no answer
$ ssh <user>@10.0.0.151 hostname
node-2
$ ssh <user>@10.0.0.152 hostname
node-3
Node-1 took a detour. It kept its temporary 10.0.0.149 address for a while after I reserved .150 for its Ethernet MAC, because a reservation only takes effect when the Pi next asks for an address, and pinging .150 just timed out. Once it was on .150, its default route said proto static, which means that address is set on the Pi itself and not leased by DHCP. The router’s reservation still keeps the address from being handed to anything else:
# On node-1
$ ip route
default via 10.0.0.1 dev eth0 proto static metric 100
10.0.0.0/24 dev eth0 proto kernel scope link src 10.0.0.150 metric 100
...
The lesson is that the router’s device list shows what the gateway has recorded, not what the Pi is actually using. Pinging the address and reading ip route on the Pi tell you the truth.
Resetting node-1 and installing containerd 2.x
Node-1 still had Debian’s containerd 1.7 and the old Cilium test cluster, so it needed a clean start. I reset kubeadm, removed the old runtime and its image store, and rebooted:
# On node-1: tear down the old cluster
$ sudo kubeadm reset -f
$ sudo systemctl stop kubelet containerd
$ sudo rm -rf /etc/cni/net.d $HOME/.kube

# Remove Debian's container runtime and its image store
$ sudo apt-get remove -y containerd runc
$ sudo rm -rf /var/lib/containerd

# Reboot to clear the old network interfaces and rules
$ sudo reboot
Then I installed containerd.io from Docker’s apt repository, exactly as on nodes 2 and 3. dpkg stopped to ask about the config.toml Debian’s package left behind, but either answer works because the next step regenerates it. Node-1 then matched the other two: containerd v2.4.1, kubeadm v1.36.5, seven pre-pulled images, and 4.7G (35%) of disk used, down from 7.8G (58%) before the reset.
kube-vip: one stable address for three API servers
With three control plane nodes, everything that talks to the cluster needs a single address that keeps working when one node dies. If kubectl, kubelet and Cilium all pointed at node-1’s own address, losing node-1 would cut them off from the cluster even though nodes 2 and 3 were fine. kubeadm lets you name that address with --control-plane-endpoint, and kube-vip is what makes it real.
kube-vip runs as a pod on each control plane node and holds a leader election through a lease object in the cluster. The leader adds the virtual IP to its network interface and announces it on the local network with ARP, so traffic for that address goes to it. If the leader dies, its lease expires, another node wins the election, takes the address and announces it. The virtual IP isn’t a machine. It’s an extra address that one node at a time claims.
It runs as a static pod because it has to start before the cluster exists: kubeadm init needs the address to be reachable, so kubelet starts kube-vip straight from the manifests directory, the same way it starts etcd and the API server. Two limits are worth knowing. In ARP mode only the leader holds the address, so API traffic isn’t spread across the three servers. And ARP only works on one shared network segment, which is one more reason the Pis are on Ethernet.
Reserving the address
The gateway’s DHCP pool turned out to be the whole subnet:
DHCP Beginning Address: 10.0.0.2
DHCP Ending Address:    10.0.0.253
DHCPv4 Lease Time:      2 Days
So my planned virtual IP, 10.0.0.160, sat inside the pool. kube-vip claims its address over ARP and never asks DHCP, so the gateway has no idea it’s in use and could lease it to a phone or a TV, and then two devices would fight over the API endpoint. To prevent that, I reserved 10.0.0.160 in the gateway against a made-up MAC address, 02:00:00:00:01:60, with the name k8s-vip. A leading 02 marks a MAC as locally administered, so it can’t collide with a real card’s factory address, and the gateway accepted it. The fake MAC never appears on the network, because kube-vip announces the address with the leader’s real MAC. It exists only in the gateway’s bookkeeping.
Bootstrapping the first control plane
kube-vip’s image can generate its own static pod manifest. I ran it with ctr in the same namespace kubelet uses, pointed it at eth0 and the virtual IP, and put the result in the static pod directory before running kubeadm init:
# On node-1: install jq, which the version lookup below uses
$ sudo apt-get install -y jq
$ sudo mkdir -p /etc/kubernetes/manifests

# The virtual IP, and the network interface it will live on
$ export VIP=10.0.0.160 INTERFACE=eth0

# Look up the newest kube-vip release
$ export KVVERSION=$(curl -sL https://api.github.com/repos/kube-vip/kube-vip/releases | jq -r ".[0].name")

# Pull the image into the namespace kubelet uses
$ sudo ctr -n k8s.io image pull ghcr.io/kube-vip/kube-vip:$KVVERSION

# Have the image generate its own static pod manifest, in ARP mode with leader election
$ sudo ctr -n k8s.io run --rm --net-host ghcr.io/kube-vip/kube-vip:$KVVERSION vip /kube-vip manifest pod \
    --interface $INTERFACE --address $VIP --controlplane --arp --leaderElection \
    | sudo tee /etc/kubernetes/manifests/kube-vip.yaml >/dev/null

# Point kube-vip at super-admin.conf for the moment of bootstrap
$ sudo sed -i 's#path: /etc/kubernetes/admin.conf#path: /etc/kubernetes/super-admin.conf#' /etc/kubernetes/manifests/kube-vip.yaml

# Initialize the cluster, with the virtual IP as the control plane endpoint
$ sudo kubeadm init \
    --control-plane-endpoint 10.0.0.160:6443 \
    --apiserver-advertise-address 10.0.0.150 \
    --pod-network-cidr 10.244.0.0/16 \
    --upload-certs \
    --skip-phases addon/kube-proxy
A few of those flags are worth explaining. --controlplane --arp --leaderElection makes kube-vip provide the control plane address in ARP mode with a leader election. I left out --services, which would also have it load-balance Services, because I haven’t picked a tool for that yet. The sed switches kube-vip to super-admin.conf for the moment of bootstrap: since Kubernetes 1.29, kubeadm doesn’t make admin.conf usable until init finishes, so kube-vip needs the other credential to take the leader lease. On the kubeadm init side, --control-plane-endpoint makes the virtual IP the cluster’s address, --upload-certs stores the control plane certificates, encrypted, so nodes 2 and 3 can fetch them when they join, and --skip-phases addon/kube-proxy leaves room for Cilium to replace it. The two kubeadm join commands printed at the end of init contain a token and a certificate key, so I’m keeping them out of this post.
After init, I set up kubectl, switched kube-vip back to the normal admin.conf (which makes kubelet restart its pod), and looked at the result:
# On node-1: set up kubectl for my user
$ mkdir -p $HOME/.kube
$ sudo cp /etc/kubernetes/admin.conf $HOME/.kube/config
$ sudo chown $(id -u):$(id -g) $HOME/.kube/config

# Switch kube-vip back to the normal admin.conf (kubelet restarts its pod)
$ sudo sed -i 's#path: /etc/kubernetes/super-admin.conf#path: /etc/kubernetes/admin.conf#' /etc/kubernetes/manifests/kube-vip.yaml

# The virtual IP should now be a second address on eth0
$ ip -br addr show eth0
eth0             UP             10.0.0.150/24 10.0.0.160/32 <IPv6 addresses omitted>

# While kube-vip's pod was restarting, kubectl couldn't reach the address
$ kubectl get nodes
E1012 23:59:35.109104    3406 memcache.go:265] "Unhandled Error" err="couldn't get current server API group list: Get \"https://10.0.0.160:6443/api?timeout=32s\": dial tcp 10.0.0.160:6443: connect: no route to host"
...
Unable to connect to the server: dial tcp 10.0.0.160:6443: connect: no route to host

# A few seconds later, the control plane pods were visible
$ kubectl get pods -A
NAMESPACE     NAME                             READY   STATUS    RESTARTS   AGE
kube-system   coredns-589f44dc88-2thfs         0/1     Pending   0          17s
kube-system   coredns-589f44dc88-sklk9         0/1     Pending   0          17s
kube-system   etcd-node-1                      1/1     Running   26         22s
kube-system   kube-apiserver-node-1            1/1     Running   24         23s
kube-system   kube-controller-manager-node-1   1/1     Running   13         22s
kube-system   kube-scheduler-node-1            1/1     Running   14         22s
kube-system   kube-vip-node-1                  1/1     Running   0          2s
The virtual IP shows up as a second address on eth0, 10.0.0.160/32, and the kube-vip-node-1 pod is running. The no route to host errors are from the few seconds while kube-vip’s pod was restarting after the sed edit, which briefly removed the address. About a minute later, the API answered through the virtual IP, and the node was NotReady only because there’s no network plugin yet:
# On node-1
$ kubectl get nodes
NAME     STATUS     ROLES           AGE   VERSION
node-1   NotReady   control-plane   94s   v1.36.5
$ curl -k https://10.0.0.160:6443/livez; echo
ok
One thing I hadn’t explained was the restart counts in that pod list: 26 for etcd, 24 for the API server, 14 for the scheduler and 13 for the controller manager, several times higher than after the earlier single-node init. I checked whether anything was still restarting:
# On node-1
$ for p in etcd-node-1 kube-apiserver-node-1 kube-scheduler-node-1 kube-controller-manager-node-1 kube-vip-node-1; do
  echo -n "$p: "; kubectl -n kube-system get pod $p -o jsonpath='{.status.containerStatuses[0].restartCount} restarts, started {.status.containerStatuses[0].state.running.startedAt}{"\n"}'
done
date -u
etcd-node-1: 26 restarts, started 2026-10-13T06:59:19Z
kube-apiserver-node-1: 24 restarts, started 2026-10-13T06:59:19Z
kube-scheduler-node-1: 14 restarts, started 2026-10-13T06:59:19Z
kube-controller-manager-node-1: 13 restarts, started 2026-10-13T06:59:19Z
kube-vip-node-1: 0 restarts, started 2026-10-13T06:59:46Z
Tue 13 Oct 07:02:48 UTC 2026
$ sudo journalctl -u kubelet --since "-10 min" --no-pager | tail -40
Oct 13 00:00:25 node-1 kubelet[3354]: I1013 00:00:25.747992    3354 kuberuntime_gc.go:364] "Error getting ContainerStatus for containerID" containerID="08c33616fc9e..." err="rpc error: code = NotFound ... not found"
...
Oct 13 00:01:25 node-1 kubelet[3354]: E1013 00:01:25.706169    3354 kubelet_node_status.go:390] "Node not becoming ready in time after startup"
Oct 13 00:01:25 node-1 kubelet[3354]: I1013 00:01:25.817611    3354 kubelet.go:3262] "Container runtime network not ready" networkReady="NetworkReady=false reason:NetworkPluginNotReady message:Network plugin returns error: cni plugin not initialized"
...
The counts hadn’t moved in the three and a half minutes since the earlier listing, and all four control plane containers shared one start time, 06:59:19 UTC (23:59:19 local). They weren’t crash-looping one at a time. They were restarted together, once, shortly before kube-vip’s pod started at 06:59:46. The kubelet journal showed no probe failures. It showed some harmless garbage-collection messages about old containers that were already gone, a notice that the node wasn’t becoming ready, and a message every five seconds that the CNI plugin isn’t initialized, which is expected until Cilium is installed.
I still can’t explain how the counts got that high during the first seconds of init, so I’m leaving that as an open question. But the cluster is stable now, and that was the thing I needed to know before adding more to it.
Installing Cilium on the HA control plane
This is the same install as on the single node, with one change: Cilium is pointed at the virtual IP instead of node-1’s own address, so its agents keep working when the address moves between nodes.
# On node-1
$ kubectl taint nodes --all node-role.kubernetes.io/control-plane-
$ cilium install --version 1.19.5 \
  --set kubeProxyReplacement=true \
  --set k8sServiceHost=10.0.0.160 \
  --set k8sServicePort=6443 \
  --set ipam.mode=kubernetes
A few minutes later, Cilium’s three pods were running and CoreDNS had finally gone 1/1, after waiting 12 minutes for a network plugin:
# On node-1
$ kubectl get pods -A
NAMESPACE     NAME                               READY   STATUS    RESTARTS         AGE
kube-system   cilium-envoy-dmc26                 1/1     Running   0                5m23s
kube-system   cilium-operator-59594c9bf8-vqnpq   1/1     Running   0                5m23s
kube-system   cilium-pvs2d                       1/1     Running   0                5m23s
kube-system   coredns-589f44dc88-2thfs           1/1     Running   0                12m
kube-system   coredns-589f44dc88-sklk9           1/1     Running   0                12m
kube-system   etcd-node-1                        1/1     Running   26               12m
kube-system   kube-apiserver-node-1              1/1     Running   24               12m
kube-system   kube-controller-manager-node-1     1/1     Running   14 (4m34s ago)   12m
kube-system   kube-scheduler-node-1              1/1     Running   15 (4m29s ago)   12m
kube-system   kube-vip-node-1                    1/1     Running   1 (4m28s ago)    12m
The virtual IP that dropped
The scheduler, the controller manager and kube-vip had each restarted once, within seconds of each other, shortly after the Cilium install began. The logs of their previous containers explain why:
# On node-1
$ kubectl -n kube-system logs kube-scheduler-node-1 --previous | tail -15
...
E1013 07:07:19.541482       1 leaderelection.go:461] "Error retrieving lease lock" err="... context deadline exceeded" lock="kube-system/kube-scheduler"
I1013 07:07:19.541534       1 leaderelection.go:304] "Failed to renew lease" lock="kube-system/kube-scheduler" err="context deadline exceeded"
E1013 07:07:28.923806       1 server.go:328] "Leaderelection lost"
$ kubectl -n kube-system logs kube-controller-manager-node-1 --previous | tail -15
...
E1013 07:07:23.958590       1 leaderelection.go:497] "Failed to update lease" err="... context deadline exceeded" lock="kube-system/kube-controller-manager"
E1013 07:07:23.959084       1 controllermanager.go:413] "leaderelection lost/stopped"
$ kubectl -n kube-system logs kube-vip-node-1 --previous | tail -15
...
E1013 07:07:19.542063       1 leaderelection.go:461] "Error retrieving lease lock" err="... context deadline exceeded" lock="kube-system/plndr-cp-lock"
2026/10/13 07:07:29 INFO This node is becoming a follower within the cluster
2026/10/13 07:07:29 INFO [VIP] Deleting VIP ip=10.0.0.160
2026/10/13 07:07:29 ERROR lost leadership, restarting kube-vip
All three show the same thing at almost the same moment: requests to the API server timed out, so none of them could renew its leader-election lease in time. The timeout was 5 seconds for the scheduler and the controller manager, and 10 seconds for kube-vip. Those components are built to exit when they lose their lease, and kubelet restarts them. kube-vip did the same: it gave up leadership, removed 10.0.0.160 from eth0 and restarted. For a few seconds, the virtual IP didn’t exist anywhere.
kube-vip’s log shows it was talking to https://kubernetes:6443, which its manifest maps to the local API server. So the API server on node-1 itself was unresponsive for roughly ten seconds around 07:07:19 UTC (00:07 local time), right as Cilium was installing and pulling images. That matches what I measured earlier on this SD card: etcd’s disk syncs stall when image pulls and heavy writes happen, and an API server that can’t write to etcd stops answering. I haven’t confirmed that the stall came from etcd’s disk, though. etcd’s own log from that window should show it.
Two other lines in those logs look alarming but aren’t. The scheduler logged “forbidden” errors at 06:59:23, which is normal in the first seconds after init, before kubeadm finishes creating the permissions the scheduler needs. And the controller manager logged a “read version is not as new as written version” conflict, which is a harmless caching race.
The bigger lesson is about how the pieces depend on each other. kube-vip’s leader election runs through the API server, so a slow API server can make the virtual IP move for no good reason. This time it was a false alarm: nothing was wrong with the node except a busy disk. With three nodes, the address would have jumped to another one. Either way, slow control plane storage turns into a flapping API address, which is a concrete argument for SSDs.
What etcd’s own log showed
I went back to etcd’s log to see whether it agreed. Part of the picture was there. A few minutes after the stall, etcd was still reporting requests that took far longer than its 100ms expectation, including trivial one-key reads. This is summarized from etcd’s JSON log lines, with times in UTC:
07:09:01  apply request took too long  took=1.612s  (read of /registry/deviceclasses, expected 100ms)
07:09:01  apply request took too long  took=1.523s  (read of /registry/health)
07:09:01  apply request took too long  took=1.122s  (read of /registry/validatingwebhookconfigurations)
07:13:22  apply request took too long  took=284ms   (write of lease kube-system/kube-scheduler)
07:13:23  apply request took too long  took=209ms   (write of lease kube-system/plndr-cp-lock)
The last two are writes to the very leases the scheduler and kube-vip had failed to renew earlier, so etcd was slow at exactly the thing those components depend on. This isn’t proof, though. My tail started after the 07:07 stall, so it doesn’t show that window itself, and etcd also slows down when the CPU is busy, which it was while unpacking images. I can’t blame the disk alone, but the pattern fits.
Joining node-2 and node-3
The stall during the Cilium install came from pulling and unpacking images on an SD card, and joining a node adds load to the first one. So before joining anything, I pulled the Cilium, Envoy and kube-vip images onto node-2 and node-3 ahead of time, and took an etcd snapshot of node-1 as a restore point:
# On node-1
$ kubectl -n kube-system exec etcd-node-1 -- etcdctl --endpoints=https://127.0.0.1:2379 \
  --cacert=/etc/kubernetes/pki/etcd/ca.crt --cert=/etc/kubernetes/pki/etcd/server.crt \
  --key=/etc/kubernetes/pki/etcd/server.key snapshot save /var/lib/etcd/pre-join.db
...
{"level":"info","ts":"2026-10-13T07:23:47.967438Z","caller":"snapshot/v3_snapshot.go:111","msg":"fetched snapshot","endpoint":"https://127.0.0.1:2379","size":"6.8 MB","took":"222.014449ms","etcd-version":"3.6.0"}
Snapshot saved at /var/lib/etcd/pre-join.db
I no longer had the join command from kubeadm init, but it isn’t needed. A fresh one can be generated on node-1 at any time. It needs a new bootstrap token and a new certificate key, because the control plane certificates that --upload-certs stores in the cluster are encrypted with a key that is only valid for about two hours:
# On node-1
$ JOIN=$(sudo kubeadm token create --print-join-command)
$ KEY=$(sudo kubeadm init phase upload-certs --upload-certs | tail -1)
$ echo "sudo $JOIN --control-plane --certificate-key $KEY --apiserver-advertise-address 10.0.0.151"
sudo kubeadm join 10.0.0.160:6443 --token <token> --discovery-token-ca-cert-hash sha256:<hash> --control-plane --certificate-key <key> --apiserver-advertise-address 10.0.0.151
The real output has the token, hash and key filled in. Treat that line like a password, because anyone holding the token and key could join a node to the cluster. It contacts the cluster through the virtual IP (10.0.0.160:6443), not node-1’s own address. --control-plane makes the new node a control plane member with its own etcd and API server, and --certificate-key decrypts the uploaded certificates. I ran it on node-2, and it was Ready after 24 seconds, which I credit to the pre-pulled images:
# On node-1
$ kubectl get nodes
NAME     STATUS   ROLES           AGE   VERSION
node-1   Ready    control-plane   29m   v1.36.5
node-2   Ready    control-plane   24s   v1.36.5
With two etcd members, a majority is both of them, so I didn’t touch either node until the third joined. Then I ran the same command on node-3, with the last value changed to its own address, 10.0.0.152.
One small stumble along the way. When I tried to run kubectl on node-2 right after joining, it refused to connect to localhost:8080. That’s what kubectl does when it finds no kubeconfig, and a joined node has the admin credentials at /etc/kubernetes/admin.conf but no copy for my user, so I made one the same way as on node-1:
# On node-2
$ mkdir -p $HOME/.kube
$ sudo cp /etc/kubernetes/admin.conf $HOME/.kube/config
$ sudo chown $(id -u):$(id -g) $HOME/.kube/config
Giving each new node its own kube-vip
At this point only node-1 ran kube-vip, so if node-1 died, nothing would claim the virtual IP. Each control plane node needs the same manifest. It mounts admin.conf, which only exists on a node after it has joined, so the copy has to wait until then. I copied it from node-1 through my Mac, put it in the static pod directory on each node, and kubelet started the pod:
# On node-1
$ grep 'path: /etc/kubernetes' /etc/kubernetes/manifests/kube-vip.yaml
      path: /etc/kubernetes/admin.conf
$ kubectl -n kube-system get pods | grep kube-vip
kube-vip-node-1                    1/1     Running   1 (24m ago)    32m
kube-vip-node-2                    1/1     Running   0              10s
$ kubectl -n kube-system get lease plndr-cp-lock -o jsonpath='{.spec.holderIdentity}{"\n"}'
node-1
The lease holder is the node that currently owns the virtual IP. The other kube-vip pods wait on standby. Since the manifest is a static pod, the file on each node is the pod. Deleting the pod with kubectl does nothing, because kubelet recreates it, and editing or moving the file is how to change or stop it.
The result
After node-3 joined, I checked everything at once:
# On node-1: the nodes, all Ready
$ kubectl get nodes -o wide
NAME     STATUS   ROLES           AGE     VERSION   INTERNAL-IP   EXTERNAL-IP   OS-IMAGE                       KERNEL-VERSION                 CONTAINER-RUNTIME
node-1   Ready    control-plane   37m     v1.36.5   10.0.0.150    <none>        Debian GNU/Linux 13 (trixie)   6.18.50+rpt-rpi-2712 (arm64)   containerd://2.4.1
node-2   Ready    control-plane   8m50s   v1.36.5   10.0.0.151    <none>        Debian GNU/Linux 13 (trixie)   6.18.50+rpt-rpi-2712 (arm64)   containerd://2.4.1
node-3   Ready    control-plane   3m37s   v1.36.5   10.0.0.152    <none>        Debian GNU/Linux 13 (trixie)   6.18.50+rpt-rpi-2712 (arm64)   containerd://2.4.1

# One etcd pod and one kube-vip pod per node
$ kubectl -n kube-system get pods | grep -E 'kube-vip|etcd'
etcd-node-1                        1/1     Running   26             37m
etcd-node-2                        1/1     Running   0              8m50s
etcd-node-3                        1/1     Running   0              3m24s
kube-vip-node-1                    1/1     Running   1 (29m ago)    37m
kube-vip-node-2                    1/1     Running   0              5m12s
kube-vip-node-3                    1/1     Running   0              96s

# The kubernetes Service now has one backend per API server
$ kubectl get endpoints kubernetes
NAME         ENDPOINTS                                         AGE
kubernetes   10.0.0.150:6443,10.0.0.151:6443,10.0.0.152:6443   37m

# The kube-vip lease holder is the node that owns the virtual IP
$ kubectl -n kube-system get lease plndr-cp-lock -o jsonpath='{.spec.holderIdentity}{"\n"}'
node-1

# etcd's members: all three started, none a learner
$ kubectl -n kube-system exec etcd-node-1 -- etcdctl --endpoints=https://127.0.0.1:2379 \
  --cacert=/etc/kubernetes/pki/etcd/ca.crt --cert=/etc/kubernetes/pki/etcd/server.crt \
  --key=/etc/kubernetes/pki/etcd/server.key member list -w table
+------------------+---------+--------+-------------------------+-------------------------+------------+
|        ID        | STATUS  |  NAME  |       PEER ADDRS        |      CLIENT ADDRS       | IS LEARNER |
+------------------+---------+--------+-------------------------+-------------------------+------------+
|  ce094247d67c828 | started | node-2 | https://10.0.0.151:2380 | https://10.0.0.151:2379 |      false |
| 441669a7407146ce | started | node-3 | https://10.0.0.152:2380 | https://10.0.0.152:2379 |      false |
| aec334b6bd14f255 | started | node-1 | https://10.0.0.150:2380 | https://10.0.0.150:2379 |      false |
+------------------+---------+--------+-------------------------+-------------------------+------------+
Three control plane nodes, all Ready. Three etcd members, all started and none a learner, so a majority is any two of them and the cluster can lose one. The kubernetes Service now has three backends, one per API server. Three kube-vip pods, with node-1 holding the lease and so the virtual IP. This is the HA control plane I set out to build.
Cleaning up the join secrets
The join command holds a bootstrap token and the key to the uploaded control plane certificates, so once the nodes had joined, I removed both:
# On node-1
$ sudo kubeadm token delete <token ID>
bootstrap token "<token ID>" deleted
$ kubectl -n kube-system delete secret kubeadm-certs
The uploaded certificates would have been deleted on their own after about two hours, and the token expires after 24 hours. This just closes the window early.
Listing the tokens afterward showed three more that I hadn’t thought about. One was the default token that kubeadm init creates, valid for 24 hours and usable to authenticate a join. The other two were “proxy” tokens, one from each time I uploaded the control plane certificates. They have no usages, so they can’t authenticate anything. Their only job is to make the cluster delete the kubeadm-certs secret when they expire, and that secret was already gone. I deleted all three:
# On node-1
$ kubeadm token list
...
$ sudo kubeadm token delete <token ID> <token ID> <token ID>
One thing worth knowing: kubeadm token list prints the full token values, not just their IDs, so its output is as sensitive as the join command itself and shouldn’t be pasted anywhere. Nothing running on the cluster needs these tokens once the nodes have joined, because each kubelet authenticates with its own certificate, and a new token takes one command to create when I need to add a node.
Reaching the cluster from my Mac
kubectl is an ordinary API client, so any machine on my home network with a kubeconfig pointing at the virtual IP can manage the cluster. The cluster’s admin credentials live in /etc/kubernetes/admin.conf on the control plane nodes, readable only by root, so I staged a copy in my home directory on node-1, copied it to my Mac, and deleted the staged copy:
# On node-1: stage a copy of the admin credentials that my user can read
$ sudo cp /etc/kubernetes/admin.conf ~/homelab.conf && sudo chown <user> ~/homelab.conf

# On my Mac: install kubectl and copy the file over
$ brew install kubectl
$ scp <user>@10.0.0.150:~/homelab.conf ~/.kube/homelab.conf
$ chmod 600 ~/.kube/homelab.conf

# On node-1: delete the staged copy
$ rm ~/homelab.conf

# On my Mac: point kubectl at the file, and give the context a clearer name
$ export KUBECONFIG=~/.kube/homelab.conf
$ kubectl config rename-context kubernetes-admin@kubernetes homelab
The file’s server: line should point at the virtual IP, https://10.0.0.160:6443, which is what makes kubectl keep working if any one node goes away. kubeadm names every cluster’s context kubernetes-admin@kubernetes, so renaming it avoids a clash if I ever add a second kubeadm cluster. From the Mac:
# On my Mac: all three nodes are Ready
$ kubectl get nodes
NAME     STATUS   ROLES           AGE   VERSION
node-1   Ready    control-plane   50m   v1.36.5
node-2   Ready    control-plane   21m   v1.36.5
node-3   Ready    control-plane   15m   v1.36.5

# A trimmed pod list, with one of each control plane component per node
$ kubectl get pods -A
NAMESPACE     NAME                               READY   STATUS    RESTARTS       AGE
kube-system   cilium-dgb5w                       1/1     Running   0              21m
...
kube-system   etcd-node-1                        1/1     Running   26             50m
kube-system   etcd-node-2                        1/1     Running   0              21m
kube-system   etcd-node-3                        1/1     Running   0              15m
...
kube-system   kube-vip-node-1                    1/1     Running   1 (42m ago)    49m
kube-system   kube-vip-node-2                    1/1     Running   0              17m
kube-system   kube-vip-node-3                    1/1     Running   0              13m
The whole cluster is managed from the laptop, through an address that isn’t tied to any one Pi. Two cautions go with this. The file is a cluster-admin credential, so it’s as sensitive as a root password and stays out of this post and out of any synced folder. And it only works on my home network, so for remote access I’d use a VPN and not forward port 6443 on the router.
Spreading CoreDNS across the nodes
The two CoreDNS pods and the Cilium operator had been created while node-1 was the only node, and Kubernetes doesn’t move running pods onto new nodes by itself. They all sat on node-1, so losing node-1 would have taken DNS down with it. Restarting the CoreDNS deployment lets the scheduler place the new pods again:
# On my Mac
$ kubectl -n kube-system rollout restart deployment coredns
The new pods landed on node-2 and node-3. Their addresses also show Cilium’s IPAM at work: each node was handed its own slice of the pod range, 10.244.0.x on node-1, 10.244.1.x on node-2 and 10.244.2.x on node-3. The Cilium operator is still on node-1. It handles cluster-wide housekeeping and not live traffic, so I left it alone.
How the pieces fit together
A few things I wanted to understand, now that all three nodes are up.
etcd isn’t shared. Each node has its own full copy. The three members keep their copies identical using the Raft algorithm. One member is the Raft leader. A write goes to the leader, which syncs it to its own disk and sends it to the followers, and it counts as committed once a majority, two of three, have it on disk. Each API server talks only to the etcd member on its own node. That is why two members would have been fragile, since a majority of two is both of them, and why three can lose one.
The kube-vip lease is just an object in etcd. The key is /registry/leases/kube-system/plndr-cp-lock, which is the name that showed up in etcd’s slow-request warnings. Every renewal goes through the local API server and becomes an etcd write. So the virtual IP’s health depends on the API server and etcd being responsive, which is why a busy SD card made it drop during the Cilium install. The kube-vip leader and etcd’s Raft leader are separate roles, and they can be on different nodes.
The virtual IP is only one of two paths to the API. Outside clients, kubelets and Cilium’s agents use 10.0.0.160. Pods inside the cluster use the built-in kubernetes Service, 10.96.0.1, whose backends are the API servers’ own node addresses. The list grew as the nodes joined:
# On node-1
$ kubectl get endpoints kubernetes
NAME         ENDPOINTS         AGE
kubernetes   10.0.0.150:6443   10m
and later showed all three API servers, as in the result above. An ordinary Service is different: its backends are the ready pods that match a selector, which is why kube-dns lists pod addresses:
# On node-1
$ kubectl -n kube-system get endpoints kube-dns
NAME       ENDPOINTS                                                       AGE
kube-dns   10.244.0.12:9153,10.244.0.148:9153,10.244.0.12:53 + 3 more...   14m
I decided not to run a failover drill, stopping kube-vip on the leader and then powering the node off, for now. The accidental drop during the Cilium install already showed the same sequence: kube-vip lost its lease, removed the address and restarted.
What to run on it
Before installing anything else, I thought about what this hardware is good for. Each node has about 2.9Gi of memory available before any workloads, and etcd already writes roughly 12GiB a day to each SD card, so heavy writers and anything needing replicated storage are a bad fit. Everything is arm64, and workloads share nodes with the control plane, so resource requests and limits matter. My plan, in order:
- Platform first: etcd backups on a schedule with copies kept off the cluster, Argo CD with a Git repo, metrics-server, an address pool for LoadBalancer Services, cert-manager, and light monitoring with short retention.
- Then a light app or two, such as Uptime Kuma or a dashboard. I’d hold off on anything that stores passwords or serves DNS for the house until I trust the cluster.
- Experiments that match the build: a
kubeadm upgradefrom v1.36 to v1.37 one control plane node at a time, a node drain, an etcd restore from the snapshot, Cilium network policies, and Kueue with CPU quotas to play with queueing and preemption. - Not yet: databases with real data, Loki or Elasticsearch, CI runners, media transcoding, and Longhorn or Ceph. They either write heavily to the SD cards or need more memory than a node has.
Metrics-server and the kubelet’s certificate
Metrics-server collects CPU and memory numbers from each node’s kubelet and serves them through the API. It’s what makes kubectl top work, and it’s what autoscaling reads. It connects to every kubelet’s port 10250 over HTTPS and has to be sure it’s talking to the real kubelet, so it checks the kubelet’s certificate against the cluster’s certificate authority. kubeadm’s kubelets present a self-signed certificate by default, and that check fails. The quick fix is a flag that makes metrics-server skip verification. I wanted to understand the certificates, so I fixed the kubelets instead.
The cluster’s certificates
A certificate is a public key bundled with an identity and a signature from a certificate authority (CA). Anyone who trusts the CA can check the signature. Kubernetes uses certificates in two directions. Serving certificates prove a server’s identity to whoever connects, and client certificates prove who a client is, with the name inside becoming its username for access control. kubeadm creates separate CAs for the cluster, for etcd and for the front proxy, and a set of certificates under them:
# On node-1
$ sudo kubeadm certs check-expiration
...
CERTIFICATE                EXPIRES                  RESIDUAL TIME   CERTIFICATE AUTHORITY   EXTERNALLY MANAGED
admin.conf                 Oct 13, 2027 06:59 UTC   362d            ca                      no
apiserver                  Oct 13, 2027 06:59 UTC   362d            ca                      no
apiserver-etcd-client      Oct 13, 2027 06:59 UTC   362d            etcd-ca                 no
apiserver-kubelet-client   Oct 13, 2027 06:59 UTC   362d            ca                      no
controller-manager.conf    Oct 13, 2027 06:59 UTC   362d            ca                      no
etcd-healthcheck-client    Oct 13, 2027 06:59 UTC   362d            etcd-ca                 no
etcd-peer                  Oct 13, 2027 06:59 UTC   362d            etcd-ca                 no
etcd-server                Oct 13, 2027 06:59 UTC   362d            etcd-ca                 no
front-proxy-client         Oct 13, 2027 06:59 UTC   362d            front-proxy-ca          no
scheduler.conf             Oct 13, 2027 06:59 UTC   362d            ca                      no
super-admin.conf           Oct 13, 2027 06:59 UTC   362d            ca                      no

CERTIFICATE AUTHORITY   EXPIRES                  RESIDUAL TIME   EXTERNALLY MANAGED
ca                      Oct 10, 2036 06:59 UTC   9y              no
etcd-ca                 Oct 10, 2036 06:59 UTC   9y              no
front-proxy-ca          Oct 10, 2036 06:59 UTC   9y              no
Eleven certificates expire on October 13, 2027, a year after init, and the three CAs in 2036. EXTERNALLY MANAGED: no means kubeadm holds the CA keys and can renew everything itself. The admin.conf I copied to my Mac embeds a client certificate that expires on the same date, so it needs replacing when these are renewed. The kubelets’ own certificates aren’t in this list, because they manage themselves.
The kubelet’s certificate is the odd one out
The kubelet’s serving certificate, the one on port 10250, looks very different from the API server’s:
# On node-1
$ sudo openssl x509 -in /var/lib/kubelet/pki/kubelet.crt -noout -subject -issuer -enddate -ext subjectAltName
subject=CN=node-1@1791874757
issuer=CN=node-1-ca@1791874757
notAfter=Oct 13 05:59:17 2027 GMT
X509v3 Subject Alternative Name:
    DNS:node-1
$ sudo openssl x509 -in /etc/kubernetes/pki/apiserver.crt -noout -subject -issuer -enddate -ext subjectAltName
subject=CN=kube-apiserver
issuer=CN=kubernetes
notAfter=Oct 13 06:59:11 2027 GMT
X509v3 Subject Alternative Name:
    DNS:kubernetes, DNS:kubernetes.default, DNS:kubernetes.default.svc, DNS:kubernetes.default.svc.cluster.local, DNS:node-1, IP Address:10.96.0.1, IP Address:10.0.0.150, IP Address:10.0.0.160
The kubelet’s issuer, node-1-ca@1791874757, is a throwaway authority the kubelet made up for itself, which nothing else in the cluster has heard of. It also lists only DNS:node-1, with no IP address, and metrics-server connects to nodes by IP. So the check fails twice: the issuer isn’t trusted, and the name wouldn’t match anyway. The API server’s certificate is the healthy contrast. It’s signed by the cluster CA, called kubernetes, and every name or address a client might use appears in it, including 10.96.0.1 (the kubernetes Service), the node’s own address, and 10.0.0.160, the virtual IP. That’s why kubectl on my Mac gets a clean TLS connection through the VIP.
Asking the cluster for a signed certificate
The fix is a kubelet setting, serverTLSBootstrap: true. With it, the kubelet creates a certificate signing request (CSR) with the signer name kubernetes.io/kubelet-serving, listing its hostname and IP addresses. kube-controller-manager signs it with the cluster CA, which its command line points at, and the kubelet then serves with the result.
Kubernetes deliberately doesn’t approve these requests automatically. A serving certificate is an identity, and if anything could approve a request for any IP address, a rogue node could get a certificate claiming to be the API server’s address. So I approve each one by hand, after checking that its names are the node’s own hostname and address. Tools like kubelet-csr-approver can automate this with checks.
The setting has to go in two places, because the kubelet’s configuration has two layers:
| What | Where | Shared? |
|---|---|---|
| Cluster-wide defaults | the kubelet-config ConfigMap in kube-system |
Yes, one copy |
| What the kubelet actually reads | /var/lib/kubelet/config.yaml |
No, one per node |
| Its identity to the API server | /etc/kubernetes/kubelet.conf |
No, one per node |
| Its certificates | /var/lib/kubelet/pki/ |
No, one per node |
The ConfigMap is a template. kubeadm copies it into each node’s local file when the node is created, joined or upgraded, and the kubelet only ever reads the local file. So editing the ConfigMap changes nothing on a running node, but it makes the setting survive upgrades and apply to new nodes. A ConfigMap is just an object stored in etcd and read through the API server, so every node sees the same one without any file being shared.
On node-1, I added the line to the local file and restarted the kubelet, which doesn’t restart any pods. A request showed up and I approved it. A few minutes later, node-2’s request was waiting too:
# On node-2
$ kubectl get csr
NAME        AGE     SIGNERNAME                      REQUESTOR            REQUESTEDDURATION   CONDITION
csr-nvsnh   6m29s   kubernetes.io/kubelet-serving   system:node:node-1   <none>              Approved,Issued
csr-p8vb7   3m32s   kubernetes.io/kubelet-serving   system:node:node-2   <none>              Pending
Approved,Issued means the cluster CA signed it and the kubelet received the certificate. With that, metrics-server could verify node-1, and kubectl top nodes started working for it. Nodes 2 and 3 still had the self-signed certificate at that point, so metrics-server couldn’t read them. I repeated the same steps on each, and once all three kubelets had signed certificates, kubectl top nodes covered the whole cluster.
Node-3 had a stumble. Its kubelet had restarted, but grep serverTLSBootstrap /var/lib/kubelet/config.yaml printed nothing, so it had come back without the setting and never asked for a certificate. A kubelet only makes the request when it starts with the setting, so the fix was to append the line and restart it again.
This isn’t a one-time chore. The kubelet rotates its serving certificate before it expires, and each rotation sends a new request that needs approval, so if kubectl top ever breaks for one node, I’ll check for a pending request first.
What’s next
- Back up etcd on a schedule, and keep the copies off the cluster.
- Put the cluster config in Git and manage it with Argo CD, now on three nodes.
- Add SSDs for etcd when prices come down and the official drives are back in stock, and compare the fsync, write and lease-renewal behavior.
- Choose a way to hand out addresses for LoadBalancer Services, such as Cilium’s own or MetalLB.
- Rehearse a
kubeadm upgradefrom v1.36 to v1.37.